This is the 4th post in my series on High Availability and Disaster Recovery for Windows Azure. This is a step-by-step post, or a “how to” post that will build upon the Azure configuration that we built during my first three articles…
- How to Create a Site-to-Site VPN Tunnel to the Windows Azure Cloud Using a Window Server 2012 R2 Routing and Remote Access (RRAS) Server
- Extending Your Datacenter to the Azure Cloud #Azure
- Creating a SQL Server 2014 AlwaysOn Failover Cluster (FCI) Instance in Windows Azure IaaS #Azure #Cloud
We are now going to extend the existing cluster (SQL1 and SQL2) to your local data center, SQL3. This configuration will give you both high availability for your application within the Azure Cloud, as well as a disaster recovery solution should Azure suffer a major outage. You could configure this in reverse as well with your on premise datacenter as your primary site and use Windows Azure as your disaster recovery site. And of course this solution illustrates SQL Server as the application, but any cluster aware application can be protected in the same fashion.
At this point, if you have been following along your network should look like the illustration below.

Add SQL3 to the cluster
To add SQL3 to the cluster the first thing we need to do is make sure SQL3 is up and running, fully patched and added to the domain. We also need to make sure that it has an F:\ drive attached that is of the same size as the F:\ drives in use in Azure. And finally, if you relocated tempdb on the SQL cluster, make sure you have the directory structure where tempdb is located pre-configured on SQL1 as well.
Next we will add the Failover Cluster feature to SQL3.

With failover clustering installed on SQL3, we will open Failover Cluster Manager on SQL1 and click Add Node

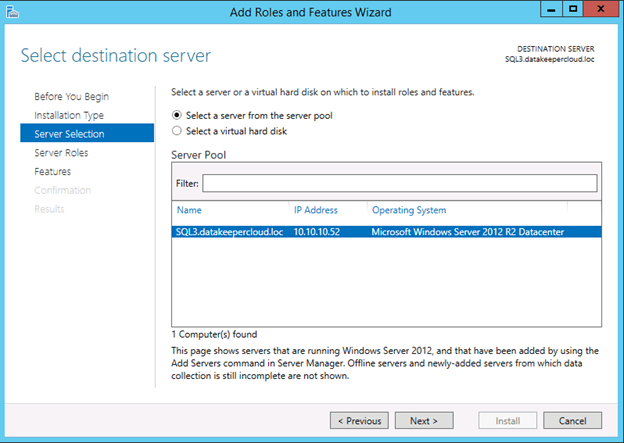
Select SQL3 and click Next

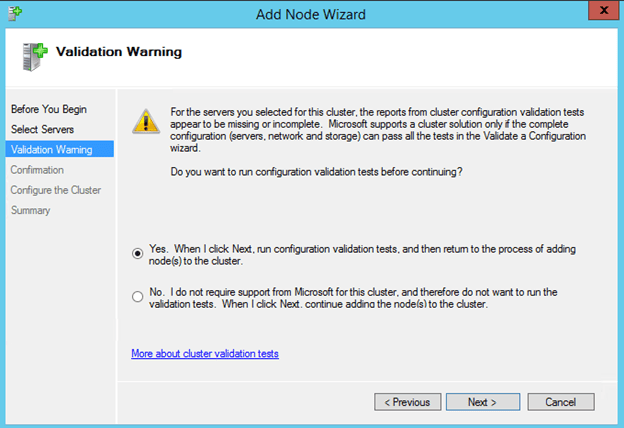
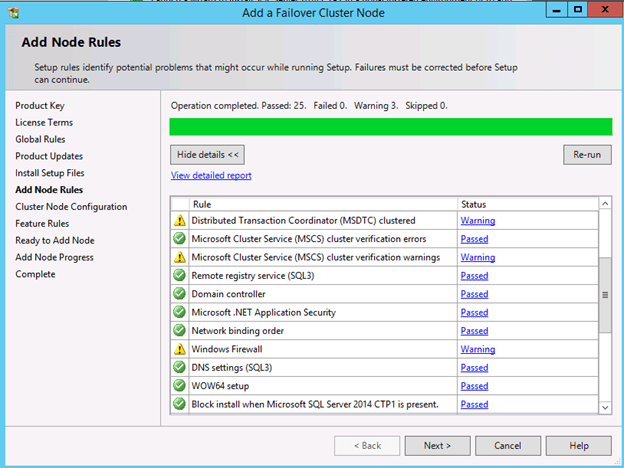
Run all the validation tests on SQL3


Let’s take a look at some of the warnings in the validation report. The RegisterAllProvidersIP property is set to 1, which can be good in a multisite cluster. You can read more about this setting here: http://technet.microsoft.com/en-us/library/ca35febe-9f0b-48a0-aa9b-a83725feb4ae
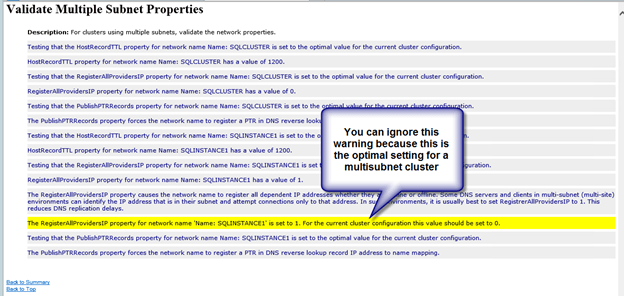
This next warning talks about only having a single network between the cluster nodes. At this time Azure only supports a single network interface between VMs, so there is nothing you can do about this warning. However, this network interface is fully redundant behind the scenes, so you can safely ignore this message.

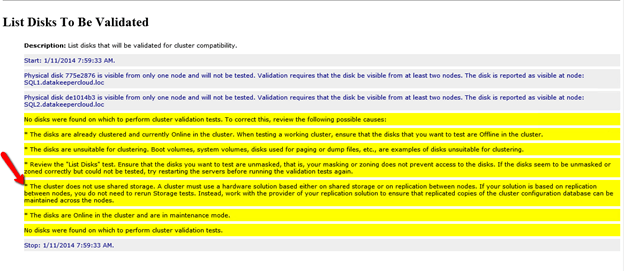
Of course you are going to see a lot of warnings around storage. That’s because this cluster has no shared storage. Instead it relies on replicated storage by SIOS DataKeeper Cluster Edition. As stated below, this is perfectly fine as the database will be kept in sync with the replication software.
We are now ready to add SQL3 to the cluster.
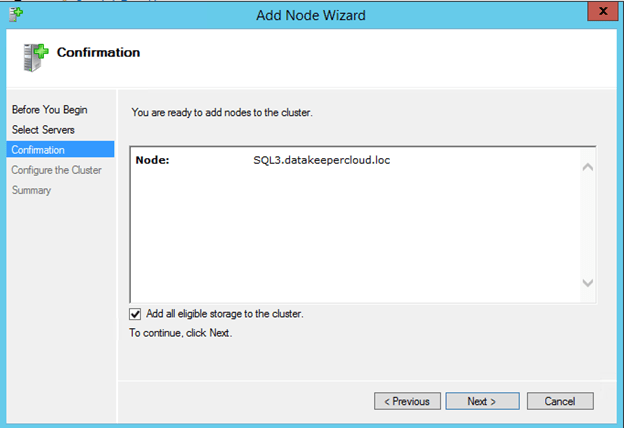

Once you click Finish, SQL3 will be added to the cluster as shown below.

However, there are a few things we need to do to complete this installation. Next we will work of the following steps:
- Add an additional IP address to the Cluster Name Object
- Tune the heartbeat settings
- Extend the DataKeeper mirror to SQL3
- Install SQL 2014 on SQL3
Add an additional IP address to the Cluster Name Object
When we added SQL3 to the cluster it went from a single site cluster to a multi-subnet cluster. If the cluster was originally created as a single site cluster and you later add a node that resides in a different subnet, you have to manually add a second IP address to the Cluster Name Object and create an OR dependency. For more information on this topic, view the following article. http://blogs.msdn.com/b/clustering/archive/2011/08/31/10204142.aspx
To add a second IP address to the Cluster Name Object (CNO), we must use the PowerShell commands described in the article mentioned above.

Now if you are following along with the MSDN article I referenced, you would expect to see these “NewIP” somewhere in the GUI. However, at least with Windows 2012 R2 I am not currently seeing this resource in the GUI.

However, if I right click on the SQLCLUSTER name and choose properties and try to add NewIP as a dependency, I see it is listed as a possible resource.

Choose “NewIP” and also make the dependency type “OR” as shown below.

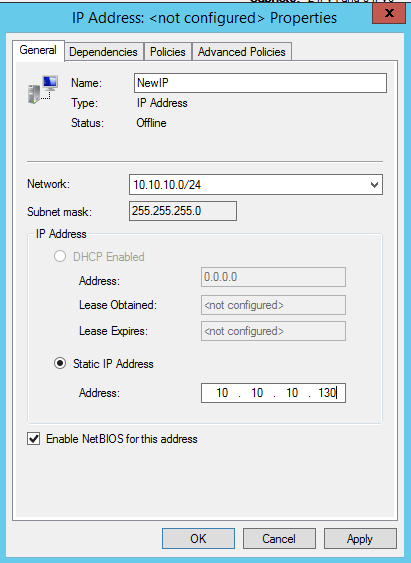
Once you click OK, it now appears in the GUI as an IP Address that needs to be configured.

We can now choose the properties of this IP Address and configure the address to use an IP address that is not currently in use in the 10.10.10.0/24 subnet, which is the same subnet where SQL3 resides.

Tune the Heartbeat Settings
We now are ready to tune the heartbeat settings. Essentially, we are going to be a little more tolerant with network communication, since SQL3 is located across a VPN connection with some latency on the line and we only have the single network interface on the cluster nodes. I highly recommend you read this article by Elden Christensen to help you decide what the right settings for your requirements are: http://blogs.msdn.com/b/clustering/archive/2012/11/21/10370765.aspx
For our environment, we are going go to what he is calling the “Relaxed” setting by setting the SameSubnetThreshold to 10 heartbeats and the CrossSubnetThreshold to 20 heartbeats.
The commands are:
(get-cluster).SameSubnetThreshold = 10
(get-cluster).CrossSubnetThreshold = 20

What this means is that heartbeats will continue to be sent every 1 second, but a SQL1 and SQL2 will only be considered dead after 10 missed heartbeats. SQL3 will be dead after 20 missed heartbeats. This will increase your Recovery Time Objective slightly (5-10 seconds), but it will also eliminate potential false failovers.
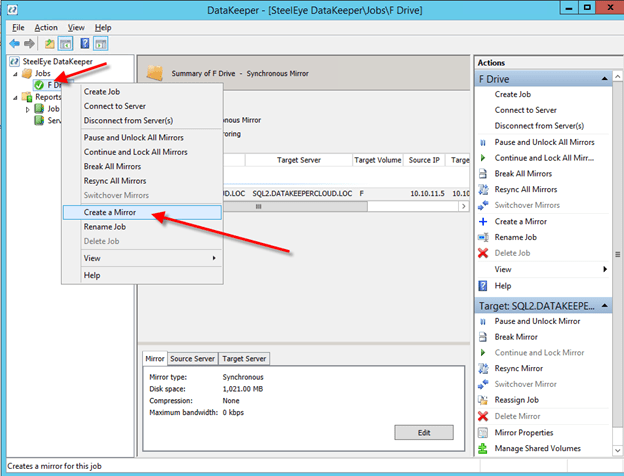
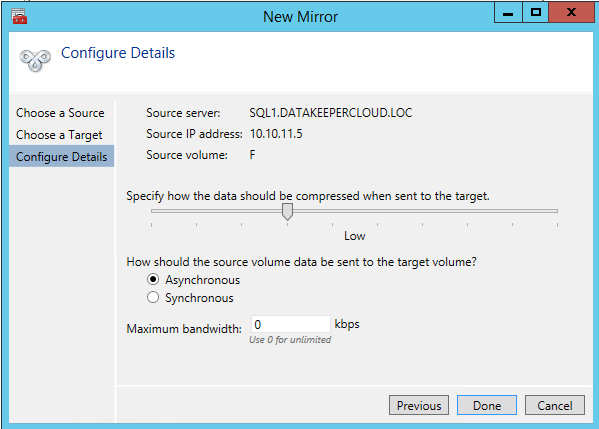
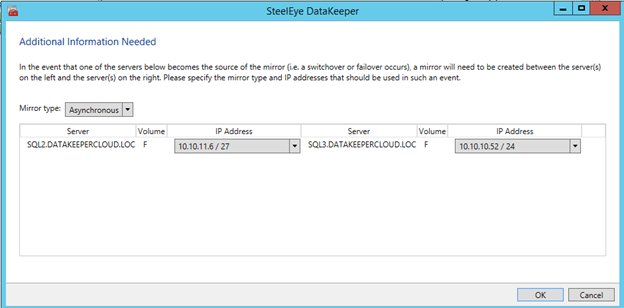
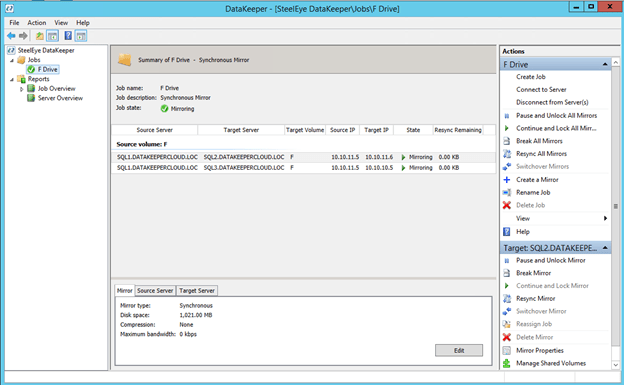
Extend the DataKeeper mirror to SQL3
Before we can install SQL 2014 on SQL3 we must extend the DataKeeper mirror so that it includes SQL3 as a replication target. Of course you must install DataKeeper Cluster Edition on SQL3 first, and make sure that is has a F:\ drive at least as big as the source of the mirror. Once DataKeeper is installed


Install SQL 2014 on SQL3
Now it is time to install SQL 2014 onto the 3rd node. The process is exactly the same as it was to install in on SQL2. Start by launching SQL Setup on SQL3.

Run through all the steps…


At this point in the installation you have to pick an IP address that is valid for SQL3’s subnet. The cluster will add this IP address with an “OR” dependency to the client access point.

Enter the passwords for your service accounts


After you complete the installation let the fun begin. You now have a multisite SQL Server cluster that should look something like this.

For more information visit https://us.sios.com/solutions/cloud-high-availability/azure/

[…] That leads us to thinking about alternate locations outside of Azure, even our own private data center. I recently wrote a step-by-step article that explains how to extend your on premise datacenter to the Azure Cloud. Once you have your datacenter connected to Windows Azure, you can either configure AlwaysOn Availability Groups or AlwaysOn Failover Clustering (multisite) for protection from a catastrophic Azure failure. I’ve written previously about the Advantages of Multisite Clustering vs. Availability Groups, so in my lab I decided to create a 2-node SQL Failover Cluster Instance up in Azure and then add a 3rd node in my primary data center. I’ve written the detailed configuration steps in my blog post entitled Creating a Multisite Cluster in Windows Azure for Disaster Recovery. […]
[…] trying to use data replication solutions like DataKeeper to replicate data into the Azure cloud for disaster recovery, or out of Azure to your private network for additional data protection, you will appreciate the […]
[…] if you have been considering using Azure as a DR site as I describe in my blog post, https://clusteringformeremortals.com/2014/01/14/creating-a-multi-site-cluster-in-windows-azure-for-di… you will be happy to know that you can get a 6 month trial of ExpressRoute for FREE! ExpressRoute […]