This article describes the steps you take to prepare the VMware infrastructure for installing and configuring a high-availability SAP ASCS/SCS instance on a Windows failover cluster by using SIOS DataKeeper as the replicated cluster storage.
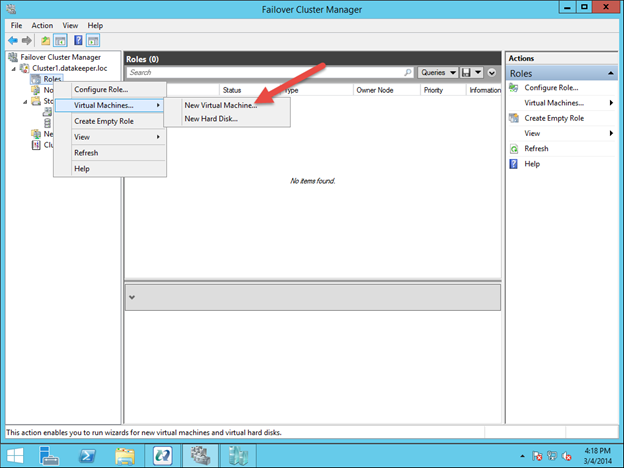
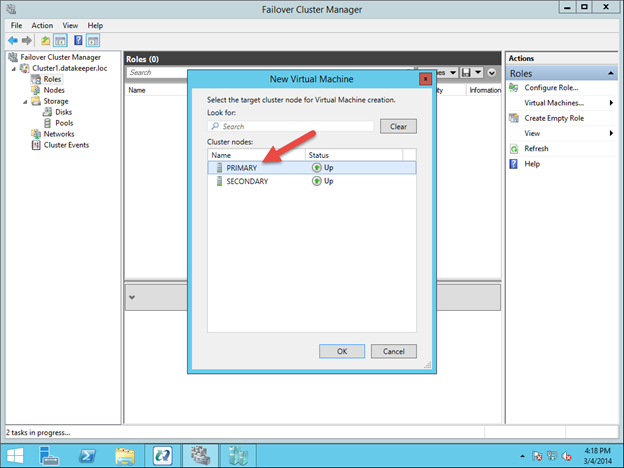
Create the ASCS VMs
For SAP ASCS / SCS cluster, deploy two VMs on different ESXi Servers.
Based on your deployment type, the host names and the IP addresses of the scenario would be like:
SAP deployment
| Host name role | Host name | Static IP address |
| 1st cluster node ASCS/SCS cluster | pr1-ascs-10 | 10.0.0.4 |
| 2nd cluster node ASCS/SCS cluster | pr1-ascs-11 | 10.0.0.5 |
| Cluster Network Name | pr1clust | 10.0.0.42 |
| ASCS cluster network name | pr1-ascscl | 10.0.0.43 |
| ERS cluster network name (only for ERS2) | pr1-erscl | 10.0.0.44 |
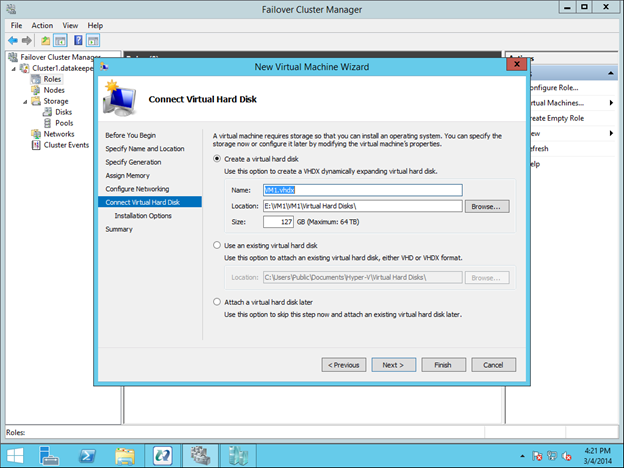
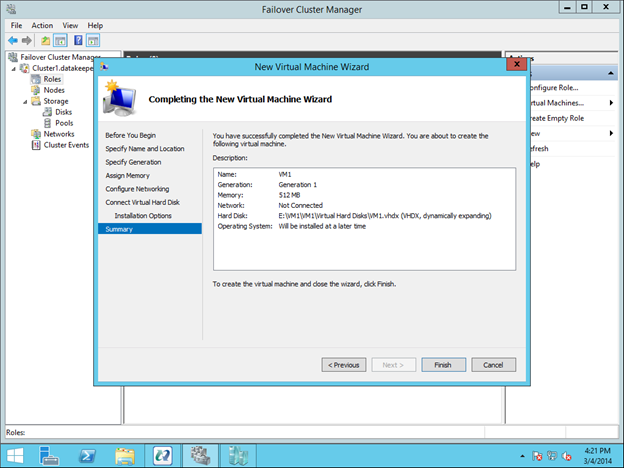
On each VM add an additional virtual disk. We will later mirror these disks with DataKeeper and use them as part of our cluster.
Add the Windows VMs to the domain
After you assign static IP addresses to the virtual machines, add the virtual machines to the domain.
Install and configure Windows failover cluster
Install the Windows failover cluster feature
Run this command on one of the cluster nodes:
PowerShell
Copy
# Hostnames of the Win cluster for SAP ASCS/SCS
$SAPSID = “PR1”
$ClusterNodes = (“pr1-ascs-10″,”pr1-ascs-11”)
$ClusterName = $SAPSID.ToLower() + “clust”
# Install Windows features.
# After the feature installs, manually reboot both nodes
Invoke-Command $ClusterNodes {Install-WindowsFeature Failover-Clustering, FS-FileServer -IncludeAllSubFeature -IncludeManagementTools }
Once the feature installation has completed, reboot both cluster nodes.
Test and configure Windows failover cluster
Copy
# Hostnames of the Win cluster for SAP ASCS/SCS
$SAPSID = “PR1”
$ClusterNodes = (“pr1-ascs-10″,”pr1-ascs-11”)
$ClusterName = $SAPSID.ToLower() + “clust”
# IP address for cluster network name
$ClusterStaticIPAddress = “10.0.0.42”
# Test cluster
Test-Cluster –Node $ClusterNodes -Verbose
New-Cluster –Name $ClusterName –Node $ClusterNodes –StaticAddress $ClusterStaticIPAddress -Verbose
Configure cluster cloud quorum
As you use Windows Server 2016 or 2019, we recommend configuring Azure Cloud Witness, as cluster quorum.
Run this command on one of the cluster nodes:
PowerShell
Copy
$AzureStorageAccountName = “cloudquorumwitness”
Set-ClusterQuorum –CloudWitness –AccountName $AzureStorageAccountName -AccessKey <YourAzureStorageAccessKey> -Verbose
Alternatively you can use a File Share Witness on a 3rd server in your environment. This server should be running on an 3rd ESXi host for redundancy.
SIOS DataKeeper Cluster Edition for the SAP ASCS/SCS cluster share disk
Now, you have a working Windows Server failover clustering configuration. To install an SAP ASCS/SCS instance, you need a shared disk resource. One of the options is to use SIOS DataKeeper Cluster Edition.
Installing SIOS DataKeeper Cluster Edition for the SAP ASCS/SCS cluster share disk involves these tasks:
- Install SIOS DataKeeper
- Configure SIOS DataKeeper
Install SIOS DataKeeper
Install SIOS DataKeeper Cluster Edition on each node in the cluster. To create virtual shared storage with SIOS DataKeeper, create a synced mirror and then simulate cluster shared storage.
Before you install the SIOS software, create the DataKeeperSvc domain user.
Add the DataKeeperSvc domain user to the Local Administrator group on both cluster nodes.
- Install the SIOS software on both cluster nodes.
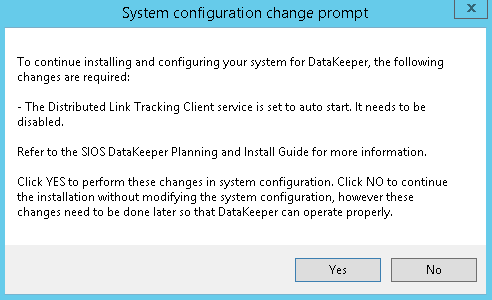
First page of the SIOS DataKeeper installation - In the dialog box, select Yes.
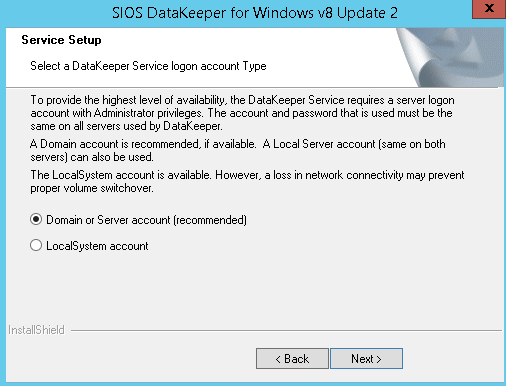
DataKeeper informs you that a service will be disabled - In the dialog box, we recommend that you select Domain or Server account.
User selection for SIOS DataKeeper - Enter the domain account username and password that you created for SIOS DataKeeper.
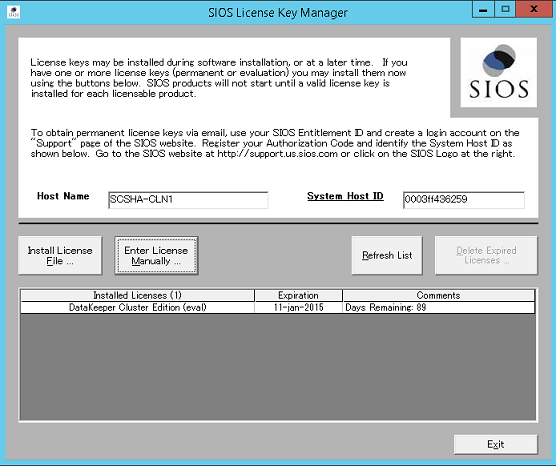
Enter the domain user name and password for the SIOS DataKeeper installation - Install the license key for your SIOS DataKeeper instance.
Enter your SIOS DataKeeper license key - When prompted, restart the virtual machine.


Configure SIOS DataKeeper
After you install SIOS DataKeeper on both nodes, start the configuration. The goal of the configuration is to have synchronous data replication between the additional disks that are attached to each of the virtual machines.
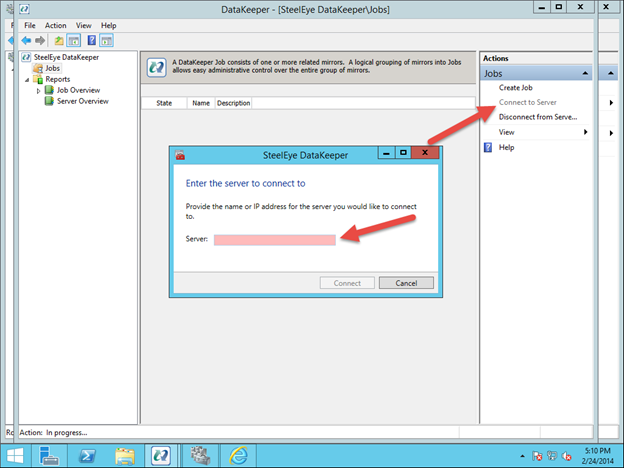
- Start the DataKeeper Management and Configuration tool, and then select Connect Server.
SIOS DataKeeper Management and Configuration tool - Enter the name or TCP/IP address of the first node the Management and Configuration tool should connect to, and, in a second step, the second node.
Insert the name or TCP/IP address of the first node the Management and Configuration tool should connect to, and in a second step, the second node - Create the replication job between the two nodes.
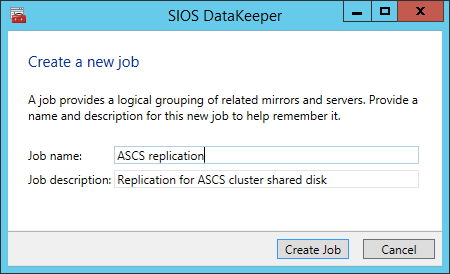
Create a replication job
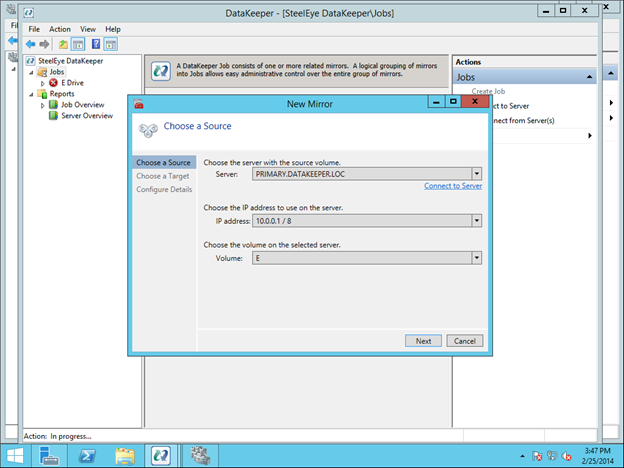
A wizard guides you through the process of creating a replication job. - Define the name of the replication job.
Define the name of the replication job
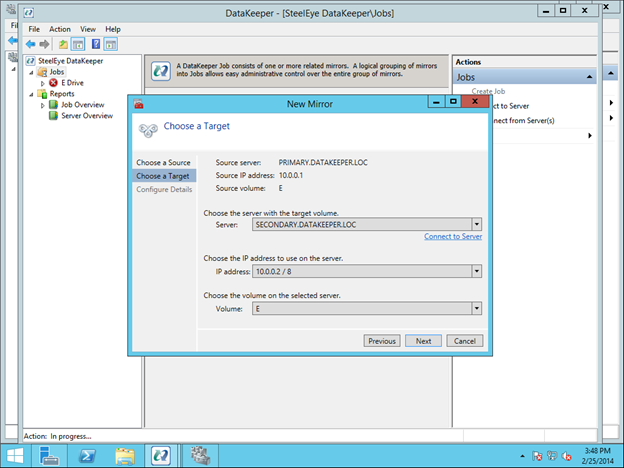
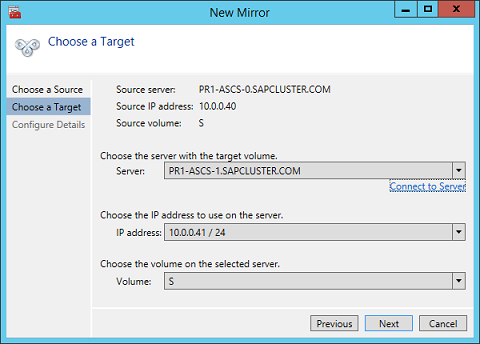
Define the base data for the node, which should be the current source node - Define the name, TCP/IP address, and disk volume of the target node.
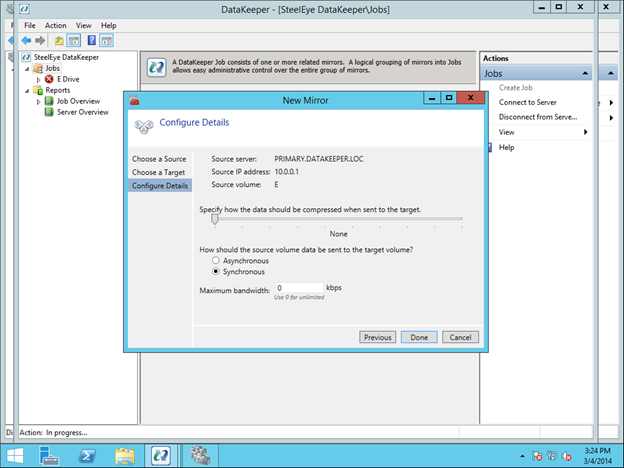
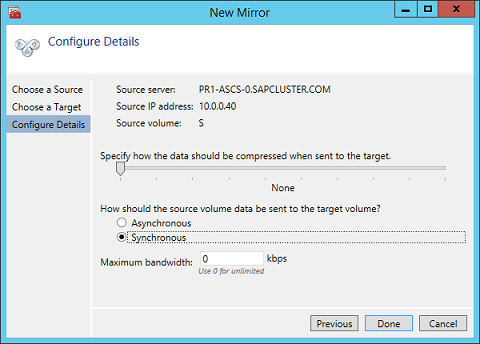
Define the name, TCP/IP address, and disk volume of the current target node - Define the compression algorithms. In our example, we recommend that you compress the replication stream. Especially in resynchronization situations, the compression of the replication stream dramatically reduces resynchronization time. Compression uses the CPU and RAM resources of a virtual machine. As the compression rate increases, so does the volume of CPU resources that are used. You can adjust this setting later.
- Another setting you need to check is whether the replication occurs asynchronously or synchronously. When you protect SAP ASCS/SCS configurations, you must use synchronous replication.
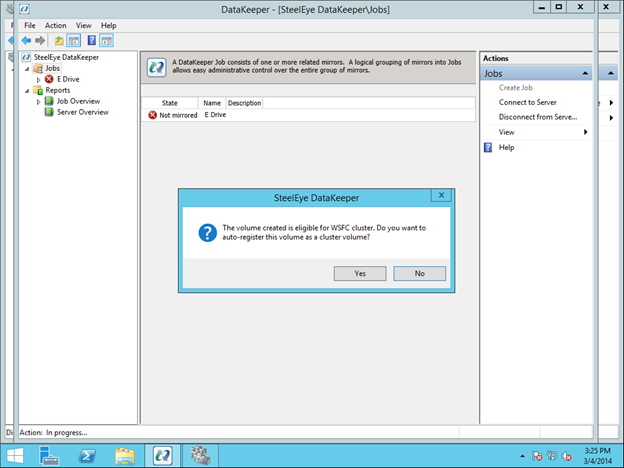
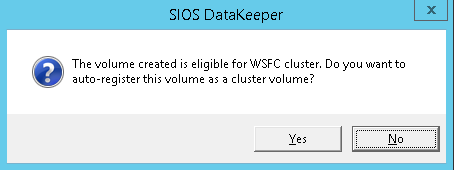
Define replication details - Define whether the volume that is replicated by the replication job should be represented to a Windows Server failover cluster configuration as a shared disk. For the SAP ASCS/SCS configuration, select Yes so that the Windows cluster sees the replicated volume as a shared disk that it can use as a cluster volume.
Select Yes to set the replicated volume as a cluster volume
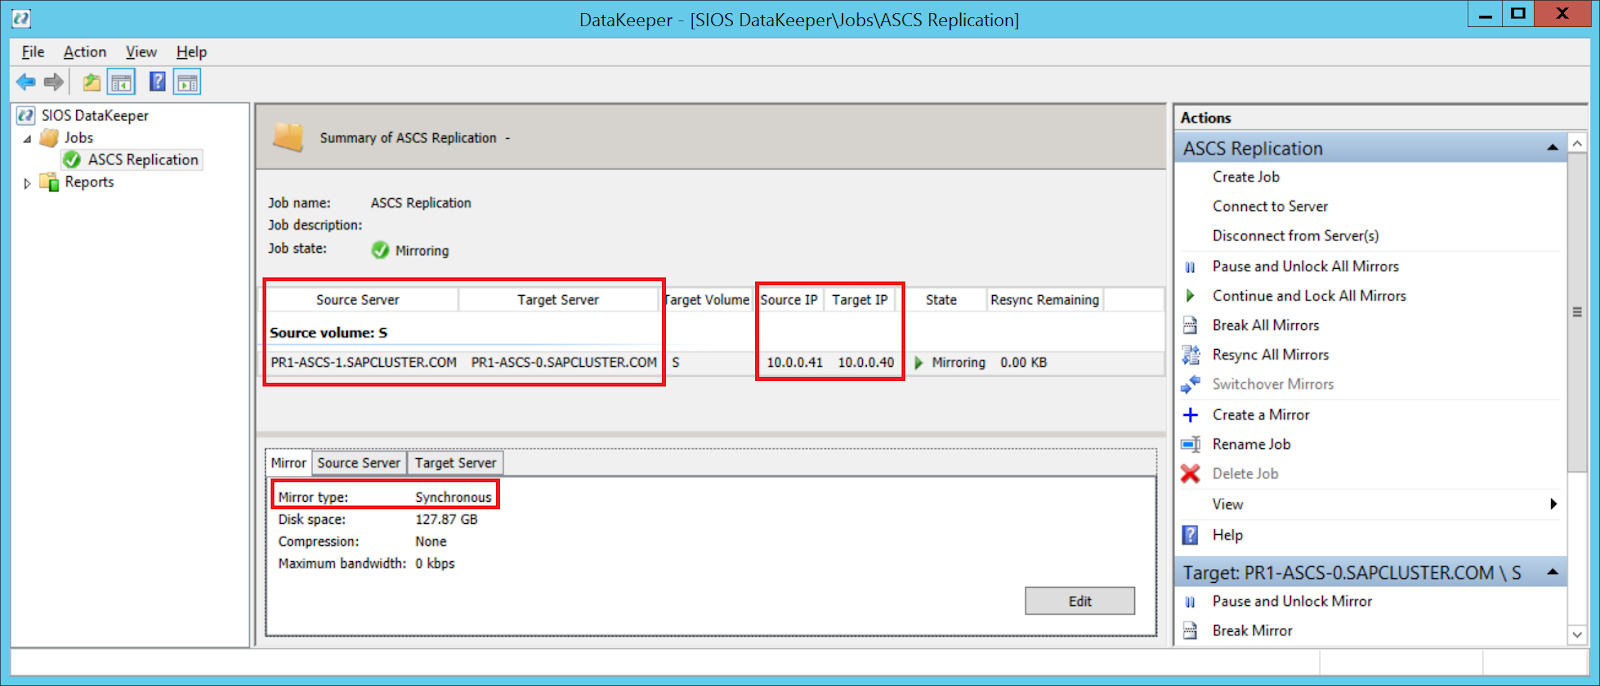
After the volume is created, the DataKeeper Management and Configuration tool shows that the replication job is active.
DataKeeper synchronous mirroring for the SAP ASCS/SCS share disk is active
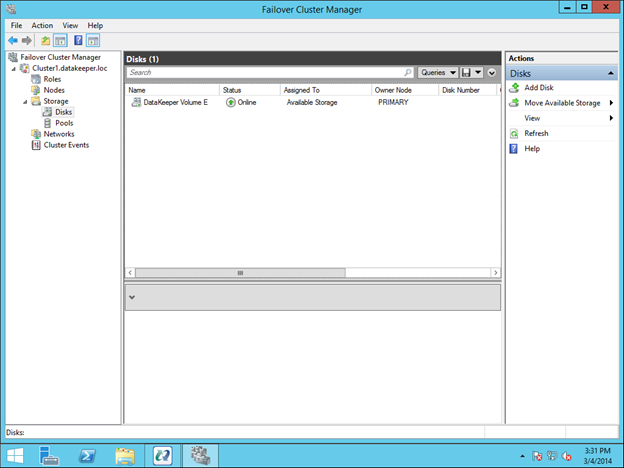
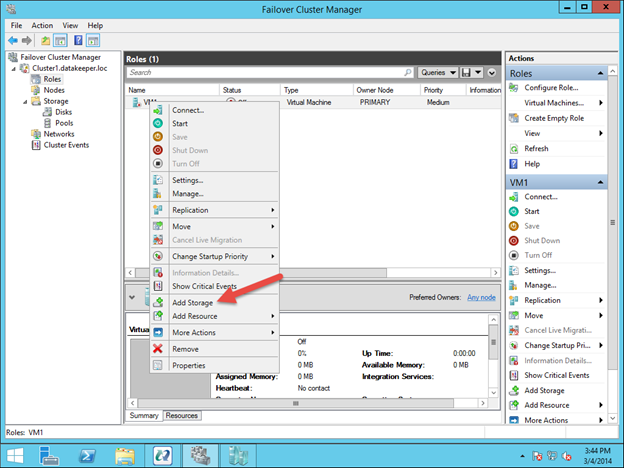
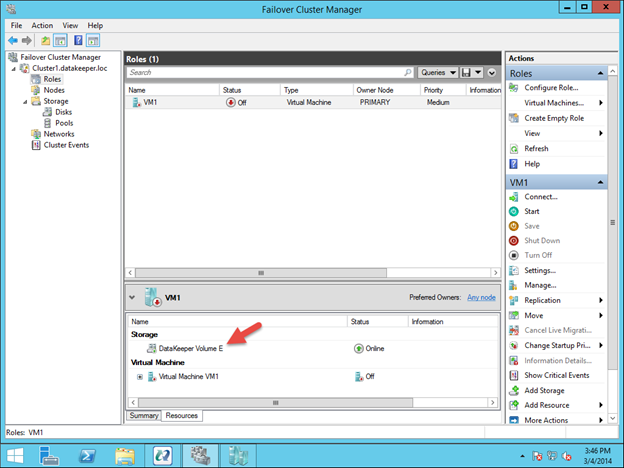
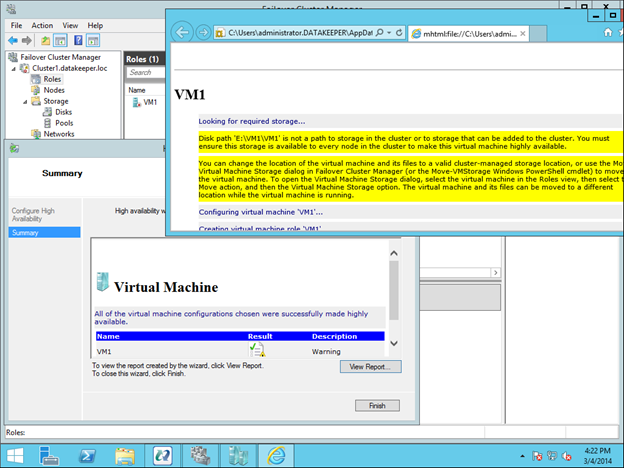
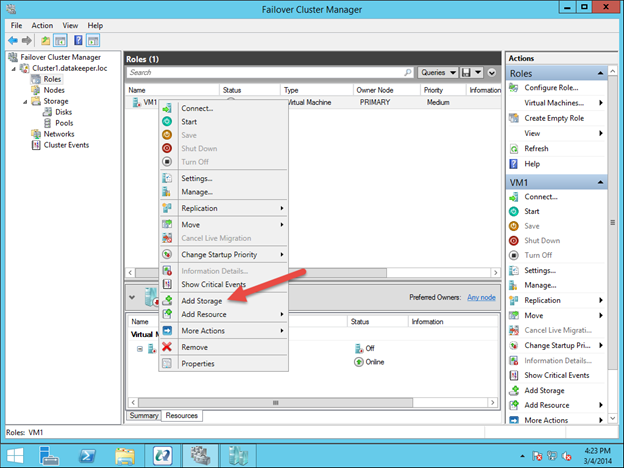
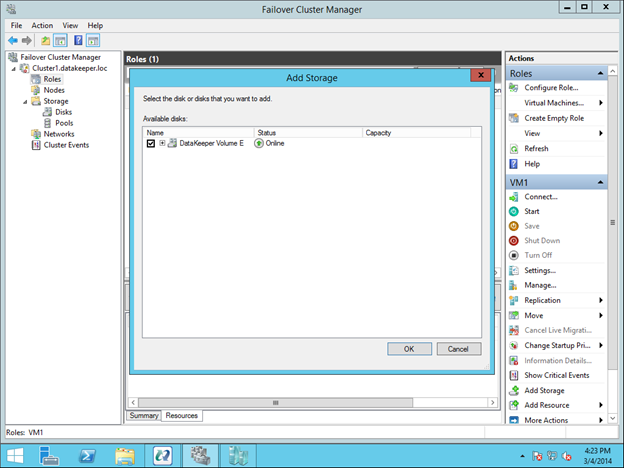
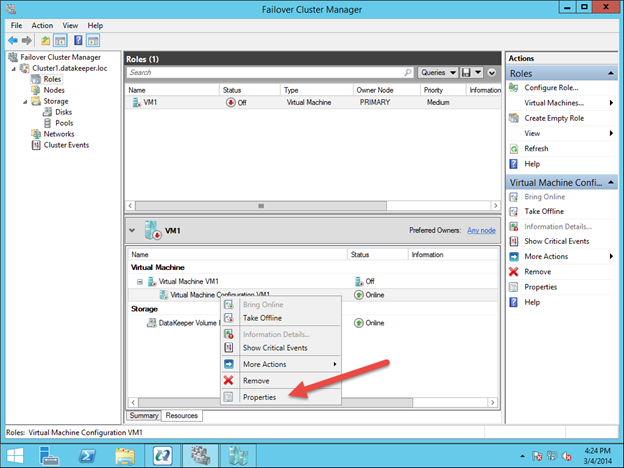
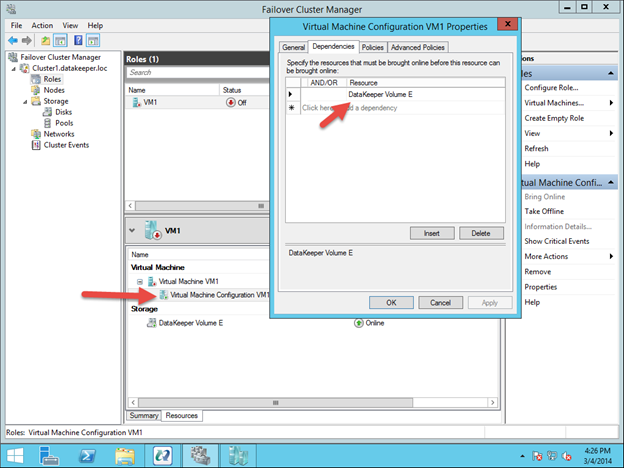
Failover Cluster Manager now shows the disk as a DataKeeper disk, as shown in Figure 45:
Failover Cluster Manager shows the disk that DataKeeper replicated


We don’t describe the DBMS setup in this article because setups vary depending on the DBMS system you use. We assume that high-availability concerns with the DBMS are addressed with the functionalities that different DBMS vendors support
The installation procedures of SAP NetWeaver ABAP systems, Java systems, and ABAP+Java systems are almost identical. The most significant difference is that an SAP ABAP system has one ASCS instance. The SAP Java system has one SCS instance. The SAP ABAP+Java system has one ASCS instance and one SCS instance running in the same Microsoft failover cluster group. Any installation differences for each SAP NetWeaver installation stack are explicitly mentioned. You can assume that the rest of the steps are the same.
Install SAP with a high-availability ASCS/SCS instance
Important
If you use SIOS to present a shared disk, don’t place your page file on the SIOS DataKeeper mirrored volumes.
Installing SAP with a high-availability ASCS/SCS instance involves these tasks:
- Create a virtual host name for the clustered SAP ASCS/SCS instance.
- Install SAP on the first cluster node.
- Modify the SAP profile of the ASCS/SCS instance.
Create a virtual host name for the clustered SAP ASCS/SCS instance
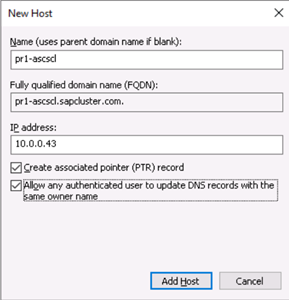
- In the Windows DNS manager, create a DNS entry for the virtual host name of the ASCS/SCS instance.
Important
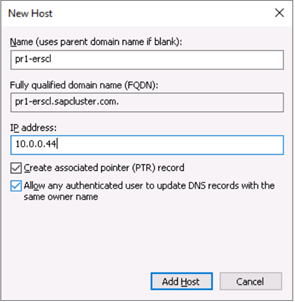
Define the DNS entry for the SAP ASCS/SCS cluster virtual name and TCP/IP address - If you are using the new SAP Enqueue Replication Server 2, which is also a clustered instance, then you need to reserve in DNS a virtual host name for ERS2 as well.
Define the DNS entry for the SAP ERS2 cluster virtual name and TCP/IP address - To define the IP address that’s assigned to the virtual host name, select DNS Manager > Domain.
New virtual name and TCP/IP address for SAP ASCS/SCS cluster configuration

Install the SAP first cluster node
- Execute the first cluster node option on cluster node A. Select:
- ABAP system: ASCS instance number 00
- Java system: SCS instance number 01
- ABAP+Java system: ASCS instance number 00 and SCS instance number 01
- Follow the SAP described installation procedure. Make sure in the start installation option “First Cluster Node”, to choose “Cluster Shared Disk” as configuration option.
The SAP installation documentation describes how to install the first ASCS/SCS cluster node.
Modify the SAP profile of the ASCS/SCS instance
If you have Enqueue Replication Server 1, add SAP profile parameter enque/encni/set_so_keepalive as described below. The profile parameter prevents connections between SAP work processes and the enqueue server from closing when they are idle for too long. The SAP parameter is not required for ERS2.
- Add this profile parameter to the SAP ASCS/SCS instance profile, if using ERS1.
- Copy
enque/encni/set_so_keepalive = true
- For both ERS1 and ERS2, make sure that the keepalive OS parameters are set as described in SAP note 1410736.
- To apply the SAP profile parameter changes, restart the SAP ASCS/SCS instance.
Install the database instance
To install the database instance, follow the process that’s described in the SAP installation documentation.
Install the second cluster node
To install the second cluster, follow the steps that are described in the SAP installation guide.
Install the SAP Primary Application Server
Install the Primary Application Server (PAS) instance <SID>-di-0 on the virtual machine that you’ve designated to host the PAS.
Install the SAP Additional Application Server
Install an SAP Additional Application Server (AAS) on all the virtual machines that you’ve designated to host an SAP Application Server instance.
Test the SAP ASCS/SCS instance failover
For the outlined failover tests, we assume that SAP ASCS is active on node A.
- Verify that the SAP system can successfully failover from node A to node B Choose one of these options to initiate a failover of the SAP cluster group from cluster node A to cluster node B:
- Failover Cluster Manager
- Failover Cluster PowerShell
- PowerShell
- Copy
$SAPSID = “PR1” # SAP <SID>
$SAPClusterGroup = “SAP $SAPSID”
Move-ClusterGroup -Name $SAPClusterGroup
- Restart cluster node A within the Windows guest operating system. This initiates an automatic failover of the SAP <SID> cluster group from node A to node B.
- Restart cluster node A from the vCenter. This initiates an automatic failover of the SAP <SID> cluster group from node A to node B.
- Verification
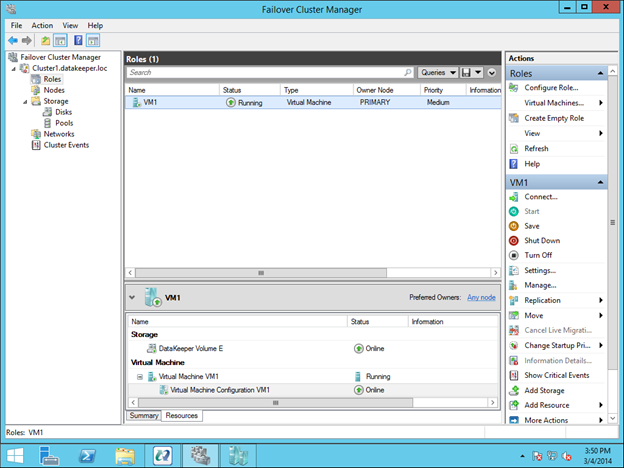
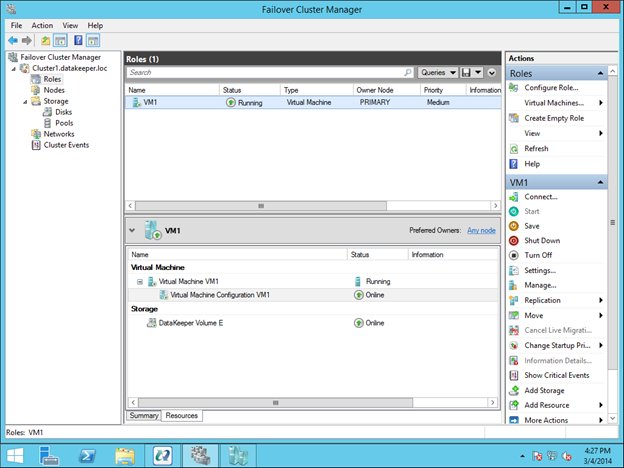
- After failover, verify that the SAP <SID> cluster group is running on cluster node B.
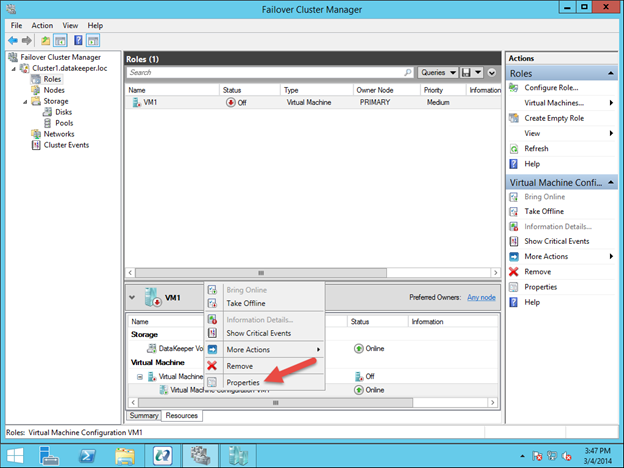
<img alt=”Figure 8: In Failover Cluster Manager, the SAP cluster group is running on cluster node B” src=”https://lh6.googleusercontent.com/42tUlQIVSU3ezK_7Z7VauFUvWXIA8Y_oz8M1EjswcY2-KGkpxHqW0mKr63NW9tchbC2DpDxPSY_fxUJmbhu2OapWQ2M005gXos6IuM6UDablgReA6DUr5ybnzan0ywZ5sGWohtcnL16y0Sh6KJbM0MOUTzpfomUJnxdpHWqyWeGs9CNZQCvQp8slogUk” width=”624″ height=”387″>
In Failover Cluster Manager, the SAP <SID> cluster group is running on cluster node B
- After failover, verify that the SAP <SID> cluster group is running on cluster node B.
After failover, verify that SIOS DataKeeper is replicating data from source volume drive S on cluster node B to target volume drive S on cluster node A.
SIOS DataKeeper replicates the local volume from cluster node B to cluster node A