When deploying business critical applications in the cloud you want to make sure they are highly available. The good news is that if you plan properly, you can achieve 99.99% (4-nines) of availability or more. However, calculating your true availability may not be as straightforward as it seems.
When considering availability you must consider the key components that make access to your application possible, which I’ll call the availability chain. Component of the availability chain are:
- Compute
- Network
- Storage
- Application
- Dependent services
Your application is only as available as your weakest link, and your downtime increases exponentially with each additional link you add to the chain. Let’s examine each of the links.
Compute Availability
Each of the three major cloud service providers have some similarities. One thing in common across all three platforms is the service level agreements (SLA) they will commit to for compute.
The SLA for all three public cloud providers for VMs when you have two or more VMs configured across different availability zones is 99.99%. Keep in mind, this SLA only guarantees the remote accessibility of one of the VMs at any given time, it makes no promises as to the availability of the services or application(s) running inside the VM. If you deploy a single VM within a single datacenter, this SLA varies from “90% of each hour” (AWS) to 99.5% (Azure and GCP) or 99.9% (Azure single VM when using Premium SSD).
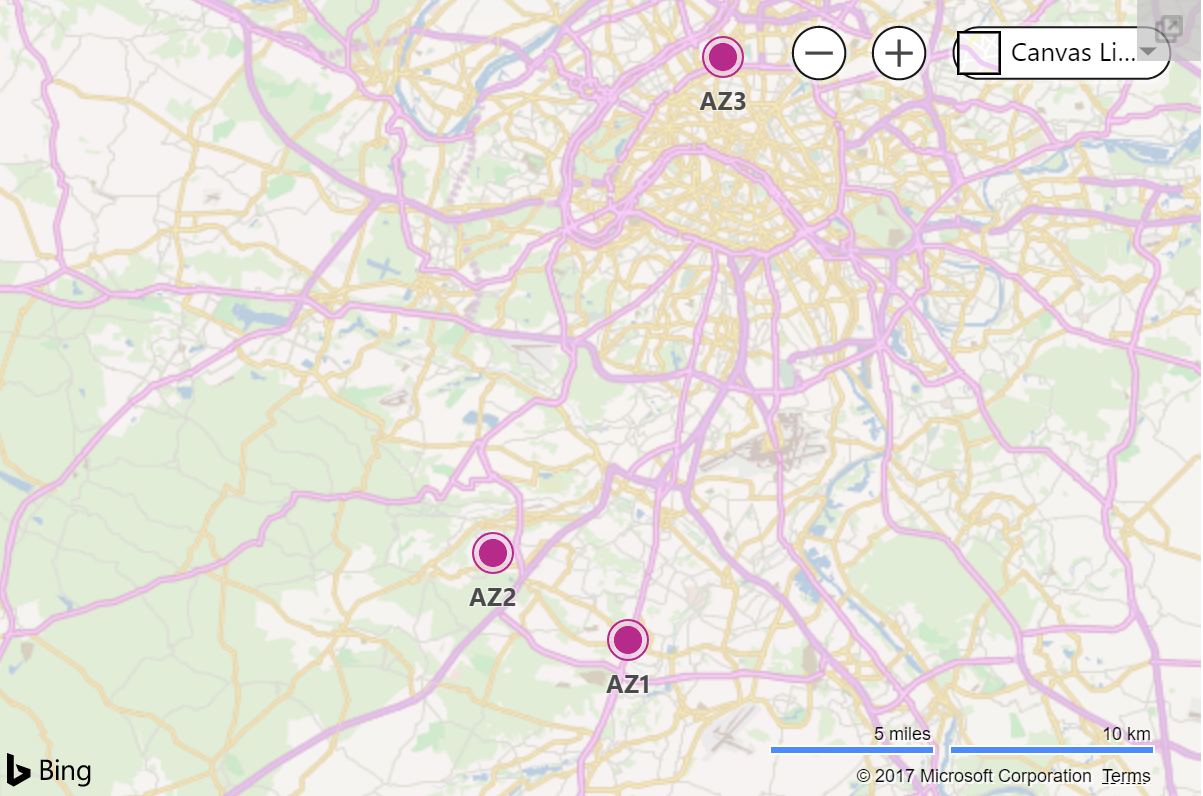
True high availability starts at 99.99%, so the first step is to ensure your application is available is to make sure the application is distributed across two or more VMs that span availability zones. With two VMs spread across two availability zones, giving you 99.99% availability of at least one of those VMs, you could theorize that if you had three VMs spread across three availability zones your availability would be even greater than 99.99%. Although the cloud providers’ SLA will never guarantee beyond 99.99% availability regardless of the number of availability zones in use, if you use pure statistics you might come to the conclusion that your availability could jump to as high as 99.999999% or 8-nines of availability, 26.30 milliseconds downtime per month.
1-(.0001*.0001) = .99999999
99.999999% availability with three availability zones?
Don’t go around quoting that number, but just keep in mind that it makes sense that if two availability zones can give you 99.99% availability, it stands to reason that three availability zones is going to give you something significantly more than 99.99% availability.
Compute is just one link in the availability chain. We still have to address network, storage and other dependent services, which all represent possible points of failure.
Network Availability
In order for your application to be available, every network hop between the client and the application and all the resources that the application depends on, must be available and working within tolerable latency ranges. You need to understand the network links between database servers, application servers, web servers and clients to know precisely where the network might fail. And remember, the more links in your availability chain the lower your overall availability will be.
Although network availability betweens VMs in the same vNet are covered under the standard compute SLA, there are other network services that you may be utilizing. Here are just a few examples of network services you could be utilizing which would impact overall application availability.
Express Route – 99.95%
VPN Gateway – 99.9% through 99.95%
Load Balancer – 99.99%
Traffic Manager – 99.99%
Elastic Load Balancer – 99.99%
Direct Connect – 99.9% – 99.99%
Building on what we have learned so far, let’s take a look at the availability of an application that is deployed across two availability zones.
99.99% compute availability
99.99% load balancer availability
.9999 * .9999 = .9998
99.98% availability = ~9 minutes downtime per month
Now that we have addressed compute and network availability, let’s move on to storage.
Storage Availability
Now here is where the story gets a little hairy. Have a look at the following storage SLAs
https://azure.microsoft.com/en-us/support/legal/sla/storage/v1_5/
https://cloud.google.com/storage/sla
https://aws.amazon.com/compute/sla/
It seems pretty clear that Azure and Google are giving you a 99.9% SLA on block storage solutions. AWS doesn’t mention EBS specifically here. They only talk about VMs and measure their single instance VMs availability by the hour instead of by the month as the other cloud providers do. For sake of discussion, lets use the 99.9% availability guarantee that both Azure and GCP have published.
Building upon our previous example, let’s add some storage to the equation.
99.99% compute availability
99.99% load balancer availability
99.9% managed disk
.9999 * .9999 * .999 = .9988
99.88% availability = ~53 minutes of downtime per month.
53 minutes of downtime is a lot more than the 9 minutes of downtime we calculated in our previous example. What can we do to minimize the impact of the 99.9% storage availability? We have to build more redundancy in the storage!
Fortunately, we usually include storage redundancy when planning for application availability. For instance, when we stand up web servers, each web server will typically store data on the locally attached disk. When deploying domain controllers, Microsoft Active Directory takes care of replicating AD information across all the domain controllers. In the case of something like SQL Server, we leverage things Always On Availability Groups or SIOS DataKeeper to keep the data in sync across locally attached disks.
The more copies of the data we have distributed across different availability zones, the more likely we will be able to survive a failure.
For example, an application that stores its data across two different disks in different availability zones will benefit from the redundancy and instead of 99.9% availability it is more likely to achieve 99.9999% availability of the storage.
1 – (.001 * .001) = .999999
If we throw that into the previous equation the picture starts to look a little brighter.
.9999 * .9999 * .999999 = .9998
99.98% availability = ~9 minutes of downtime
By duplicating the data across multiple AZs, and therefore multiple disks, we have effectively mitigated the downtime associated with cloud storage.
Application and Dependent Services Availability
You’ve done all you can do to ensure compute, network, and storage availability. But what about the application itself? Some applications can scale out and provide redundancy by load balancing between multiple instances of the same application. Think of your typical web server farm where you may typically load balance web requests between five servers. If you lose one server the load balancer simply removes it from it’s rotation until it is once again responsive.
Other applications require a little more care and monitoring. Take SQL Server for instance. Typically Always On Availability Groups or Failover Cluster Instances are used to monitor database availability and take recovery actions should a database become unresponsive due to application or system level failures. While there is no published SLA for SQL Server availability solutions, it is commonly accepted that when configured properly for high availability, a SQL Server can provide 99.99% availability.
You may rely on other cloud based services, like hosted Active Directory, hosted DNS, microservices, or even the availability of the cloud portal itself should all be factored into your overall availability equation.
Summary
Application availability is the sum of all the moving parts. Skimping in just one area can exponentially impact the overall availability of your application. Take your time and investigate all the links in your availability chain for weakness including compute, network, storage, application and dependent services.
In general the numbers presented here are hopefully worst case scenarios and your actual availability should exceed the published SLAs. Do your homework and be wary of any service that can not guarantee 99.99% availability, the typical threshold of what is considered highly available.
Human error and security were not addressed in this article. You can make your application as highly available as possible, but if you have not taken steps to secure your application against external threats and stupid human mistakes then all bets are off when it comes to availability.
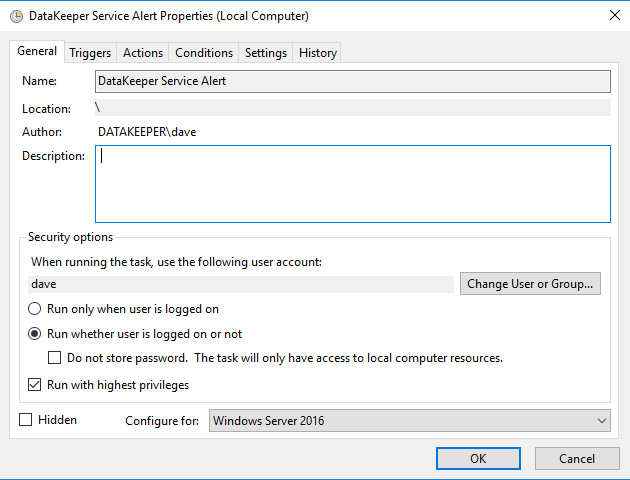
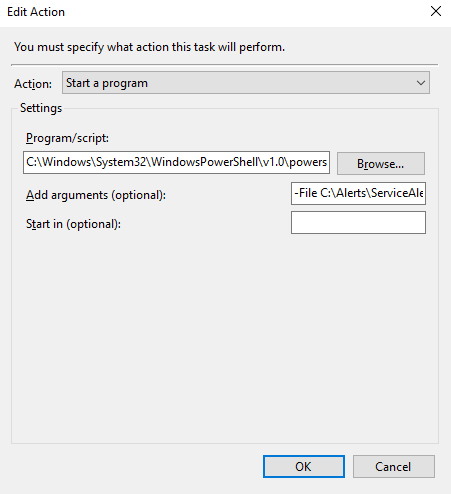
 Make sure the task is set to Run whether the user is logged on or not.