In this post we will detail the specific steps required to deploy a 2-node SQL Server Failover Cluster in a single region of Azure using Azure Resource Manager. I will assume you are familiar with basic Azure concepts as well as basic SQL Server Failover Cluster concepts and will focus this article on what is unique about deploying a SQL Server Failover Cluster in Azure Resource Manager. If you are still using Azure Classic and need to deploy a SQL Server Failover Cluster in Classic you should read my article “STEP-BY-STEP: HOW TO CONFIGURE A SQL SERVER FAILOVER CLUSTER INSTANCE (FCI) IN MICROSOFT AZURE IAAS #SQLSERVER #AZURE #SANLESS”
Before we begin, you should familiarize yourself with the Windows Azure Article, High availability and disaster recovery for SQL Server in Azure Virtual Machines. In that article all of the HA options are outlined, including AlwaysOn AG, Database Mirroring, Log Shipping, Backup and Restore and finally Failover Cluster Instances. Assuming you have dismissed those other options due to the costs associated with Enterprise Edition of SQL Server or lack of features, we are focusing on the final option – SQL Server AlwaysOn Failover Cluster Instance (FCI).
As you read that article it becomes clear that the lack of cluster aware shared storage in Azure is an obstacle in deploying SQL Server Failover clusters. However, there are a few alternatives described in that article. We will focus on using SIOS DataKeeper, to provide the storage to be used in the cluster.
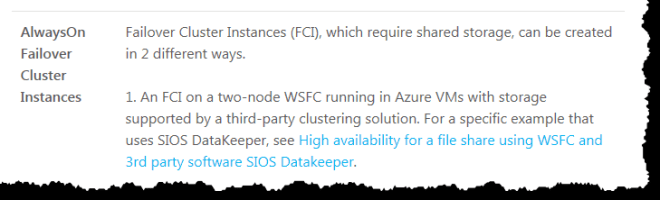 Figure 1 Microsoft’s support policy for SQL Server Failover Clusters
https://azure.microsoft.com/en-us/documentation/articles/virtual-machines-windows-classic-sql-dr/
With DataKeeper Cluster Edition you are able to take the locally attached storage, whether it is Premium or Standard Disks, and replicate those disks either synchronously, asynchronous or a mix or both, between two or more cluster nodes. In addition, a DataKeeper Volume resource is registered in Windows Server Failover Clustering which takes the place of a Physical Disk resource. Instead of controlling SCSI-3 reservations like a Physical Disk Resource, the DataKeeper Volume controls the mirror direction, ensuring the active node is always the source of the mirror. As far as SQL Server and Failover Clustering is concerned, it looks, feels and smells like a Physical Disk and is used the same way Physical Disk Resource would be used.
Pre-requisites
- You have used the Azure Portal before and are comfortable deploying virtual machines in Azure IaaS.
- Have obtained a license or eval license of SIOS DataKeeper
- Are familiar with SQL Server AlwaysOn Failover Cluster Instance. If not, please review the documentation here https://msdn.microsoft.com/en-us/library/ms189134.aspx
The Easy Way to do a Proof-of-Concept
If you are familiar with Azure Resource Manager you know one of the great new features is the ability to use Deployment Templates to rapidly deploy applications consisting of interrelated Azure resources. Many of these templates are developed by Microsoft and are readily available in their community on Github as “Quickstart Templates”. Community members are also free to extend templates or to publish their own templates on GitHub. One such template entitled “SQL Server 2014 AlwaysOn Failover Cluster Instance with SIOS DataKeeper Azure Deployment Template” published by SIOS Technology completely automates the process of deploying a 2-node SQL Server FCI into a new Active Directory Domain.
To deploy this template it is as easy as clicking on the “Deploy to Azure” button in the template.

Figure 2- Visit https://github.com/SIOSDataKeeper/SIOSDataKeeper-SQL-Cluster to rapidly provision a 2-node SQL cluster
Deploying a SQL Server Failover Cluster Instance using the Azure Portal
While the automated Azure deployment template is a quick and easy way to get a 2-node SQL Server FCI upon and running quickly, there are some limitations. For one, it uses a 180 Day evaluation version of SQL Server, so you can’t use it in production unless you upgrade the SQL eval licenses. Also, it builds an entirely new AD domain so if you want to integrate with your existing domain you are going to have to build it manually.
To build a 2-node SQL Server Failover Cluster Instance in Azure, we are going to assume you have a basic Virtual Network based on Azure Resource Manager (not Azure Classic) and you have at least one virtual machine up and running and configured as a Domain Controller. Once you have a Virtual Network and a Domain configured, you are going to provision two new virtual machines which will act as the two nodes in our cluster.
Our environment will look like this:
DC1 – Our Domain Controller and File Share Witness
SQL1 and SQL2 – The two nodes of our SQL Server Cluster
Provisioning the two cluster nodes (SQL1 and SQL2)
Using the Azure Portal, we will provision both SQL1 and SQL2 exactly the same way. There are numerous options to choose from including instance size, storage options, etc. This guide is not meant to be an exhaustive guide to deploying SQL Server in Azure as there are some really good resources out there and more published every day. However, there are a few key things to keep in mind when creating your instances, especially in a clustered environment.
Availability Set – It is important that both SQL1, SQL2 AND DC1 reside in the same availability set. By putting them in the same Availability Set we are ensuring that each cluster node and the file share witness reside in a different Fault Domain and Update Domain. This helps guarantee that during both planned maintenance and unplanned maintenance the cluster will continue to be able to maintain quorum and avoid downtime.
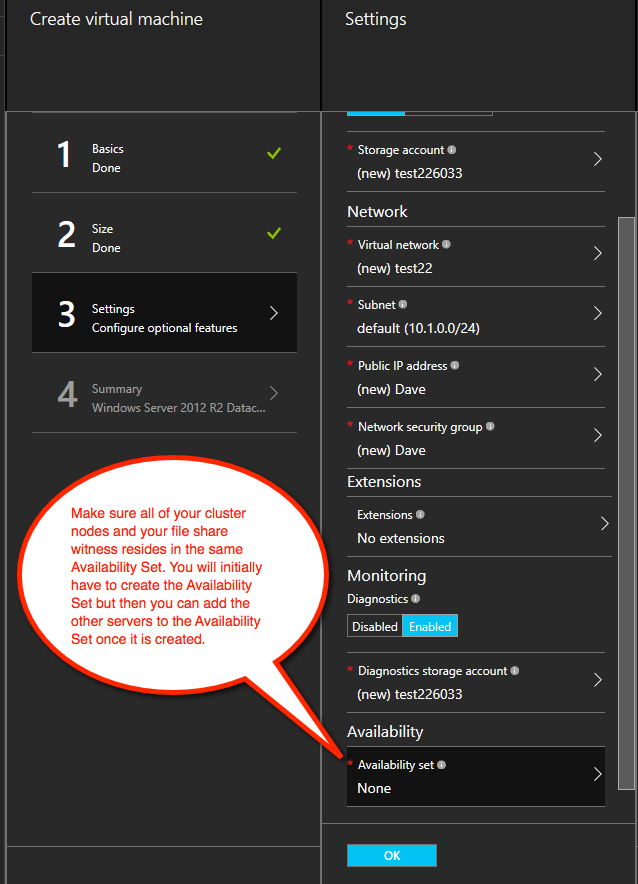
Figure 3 – Be sure to add both cluster nodes and the file share witness to the same Availability Set
Static IP Address
Once each VM is provisioned, you will want to go into the setting and change the settings so that the IP address is Static. We do not want the IP address of our cluster nodes to change.
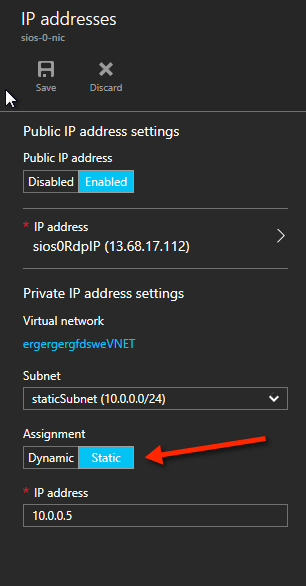
Figure 4 – Make sure each cluster node uses a static IP
Storage
As far as Storage is concerned, you will want to consult Performance best practices for SQL Server in Azure Virtual Machines. In any case, you will minimally need to add at least one additional disk to each of your cluster nodes. DataKeeper can use Basic Disk, Premium Storage or even Storage Pools consisting of multiple disks in a storage pool. Just be sure to add the same amount of storage to each cluster node and configure it identically.
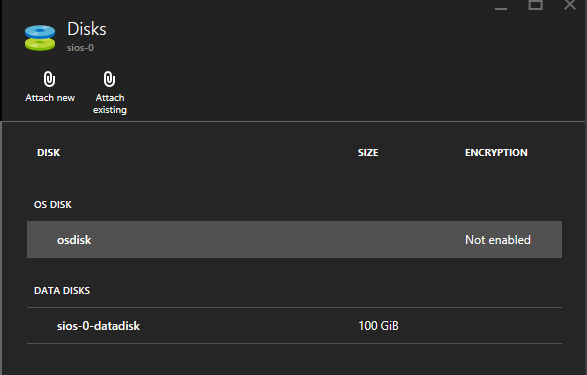
Figure 5 – make sure to add additional storage to each cluster node
Create the Cluster
Assuming both cluster nodes (SQL1 and SQL2) have been provisioned as described above and added to your existing domain, we are ready to create the cluster. Before we create the cluster, there are a few Features that need to be enabled. These features are .Net Framework 3.5 and Failover Clustering. These features need to be enabled on both cluster nodes.

Figure 6 – enable both .Net Framework 3.5 and Failover Clustering features on both cluster nodes
Once those features have been enabled, you are ready to build your cluster. Most of the steps I’m about to show you can be performed both via PowerShell and the GUI. However, I’m going to recommend that for this very first step you use PowerShell to create your cluster. If you choose to use the Failover Cluster Manager GUI to create the cluster you will find that you wind up with the cluster being issues a duplicate IP address.
Without going into great detail, what you will find is that Azure VMs have to use DHCP. By specifying a “Static IP” when we create the VM in the Azure portal all we did was create sort of a DHCP reservation. It is not exactly a DHCP reservation because a true DHCP reservation would remove that IP address from the DHCP pool. Instead, this specifying a Static IP in the Azure portal simply means that if that IP address is still available when the VM requests it, Azure will issue that IP to it. However, if your VM is offline and another host comes online in that same subnet it very well could be issued that same IP address.
There is another strange side effect to the way Azure has implemented DHCP. When creating a cluster with the Windows Server Failover Cluster GUI when hosts use DHCP (which they have to), there is not option to specify a cluster IP address. Instead it relies on DHCP to obtain an address. The strange thing is, DHCP will issue a duplicate IP address, usually the same IP address as the host requesting a new IP address. The cluster will usually complete, but you may have some strange errors and you may need to run the Windows Server Failover Cluster GUI from a different node in order to get it to run. Once you get it to run you will want to change the cluster IP address to an address that is not currently in use on the network.
You can avoid that whole mess by simply creating the cluster via Powershell and specifying the cluster IP address as part of the PowerShell command to create the cluster.
You can create the cluster using the New-Cluster command as follows:
New-Cluster -Name cluster1 -Node sql1,sql2 -StaticAddress 10.0.0.101 -NoStorage
After the cluster creation completes, you will also want to run the cluster validation by running the following command:
Test-Cluster
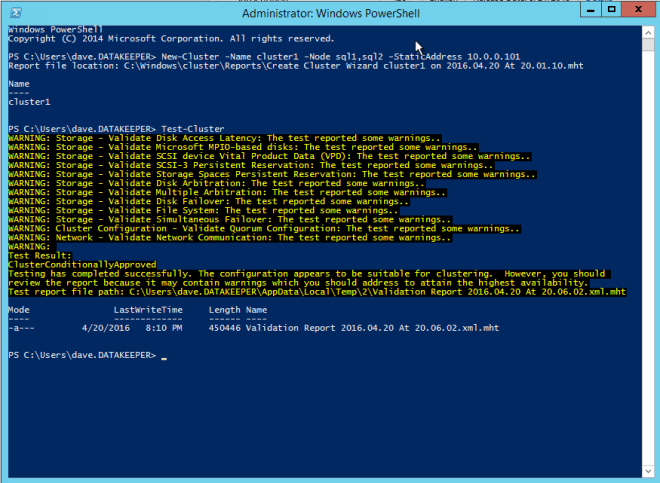
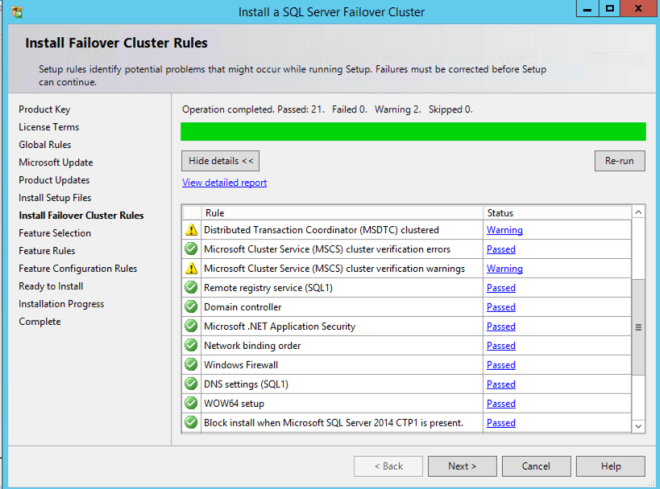
Figure 7 – The output of the cluster creation and the cluster validation commands
Create File Share Witness
Because there is no shared storage, you will need to create a file share witness on another server in the same Availability Set as the two cluster nodes. By putting it in the same availability set you can be sure that you only lose one vote from your quorum at any given time. If you are unsure how to create a File Share Witness you can review this article http://www.howtonetworking.com/server/cluster12.htm. In my demo I put the file share witness on domain controller. I have published an exhaustive explanation of cluster quorums at https://blogs.msdn.microsoft.com/microsoft_press/2014/04/28/from-the-mvps-understanding-the-windows-server-failover-cluster-quorum-in-windows-server-2012-r2/
Install DataKeeper
After the cluster is created it is time to install DataKeeper. It is important to install DataKeeper after the initial cluster is created so the custom cluster resource type can be registered with the cluster. If you installed DataKeeper before the cluster is created you will simply need to run the install again and do a repair installation.
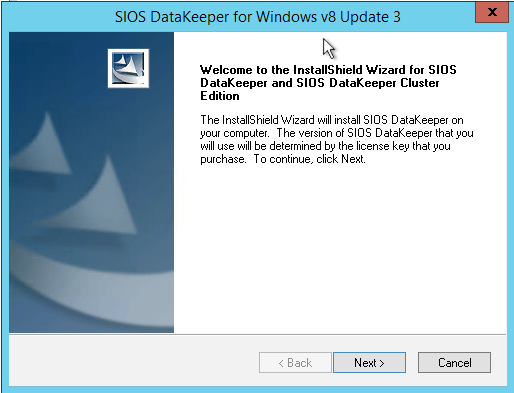
Figure 8 – Install DataKeeper after the cluster is created
During the installation you can take all of the default options. The service account you use must be a domain account and be in the local administrators group on each node in the cluster.
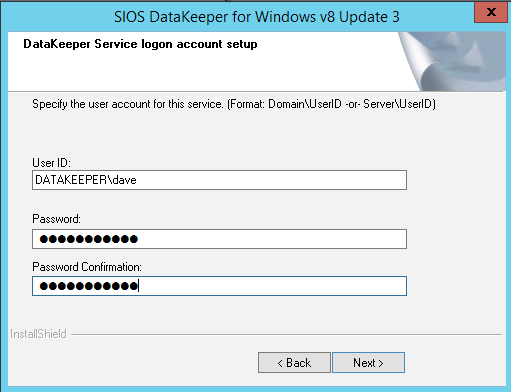
Figure 9 – the service account must be a domain account that is in the Local Admins group on each node
Once DataKeeper is installed and licensed on each node you will need to reboot the servers.
Create the DataKeeper Volume Resource
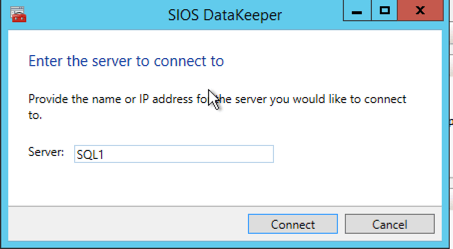
To create the DataKeeper Volume Resource you will need to start the DataKeeper UI and connect to both of the servers.
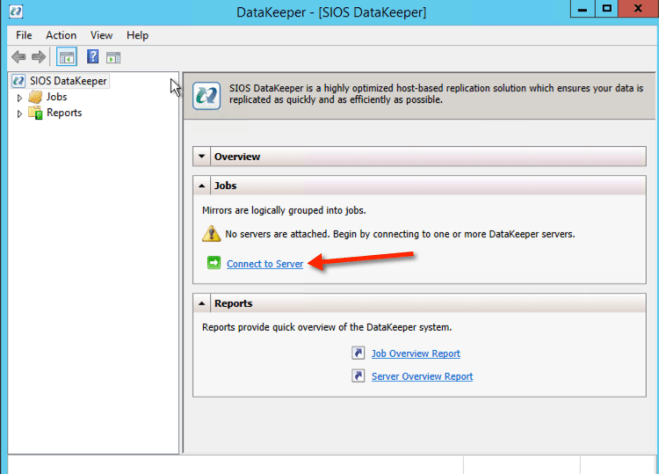 Connect to SQL1
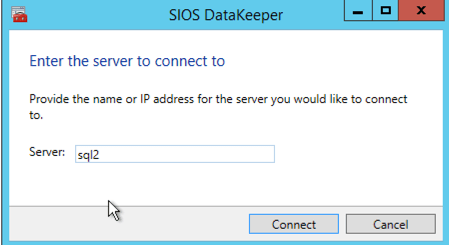
Connect to SQL2
Once you are connected to each server, you are ready to create your DataKeeper Volume. Right click on Jobs and choose “Create Job”
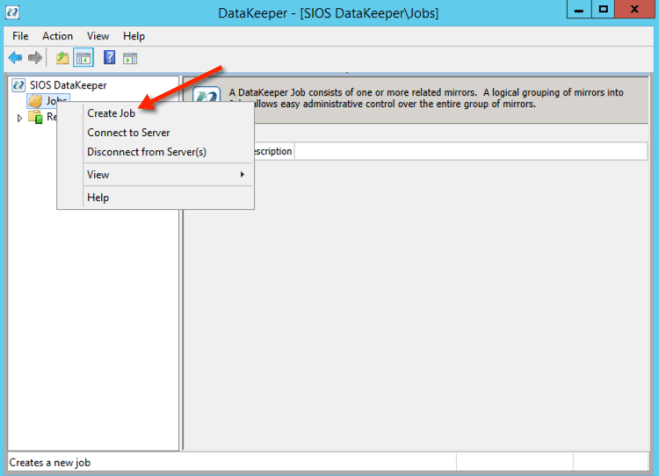
Give the Job a name and description.

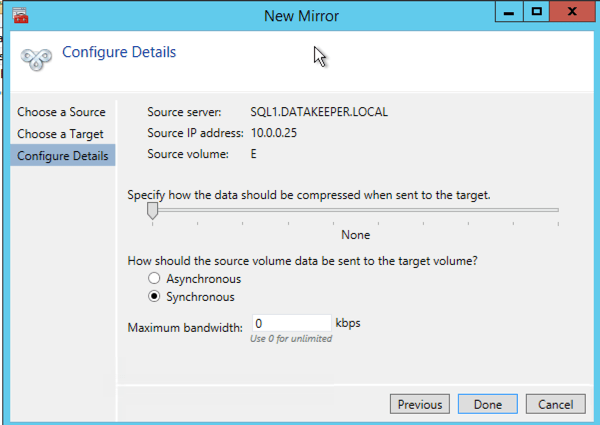
Choose your source server, IP and volume. The IP address is whether the replication traffic will travel.

Choose your target server.

Choose your options. For our purposes where the two VMs are in the same geographic region we will choose synchronous replication. For longer distance replication you will want to use asynchronous and enable some compression.
By clicking yes at the last pop-up you will register a new DataKeeper Volume Resource in Available Storage in Failover Clustering.
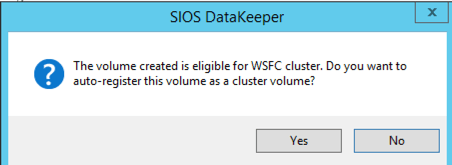
You will see the new DataKeeper Volume Resource in Available Storage.

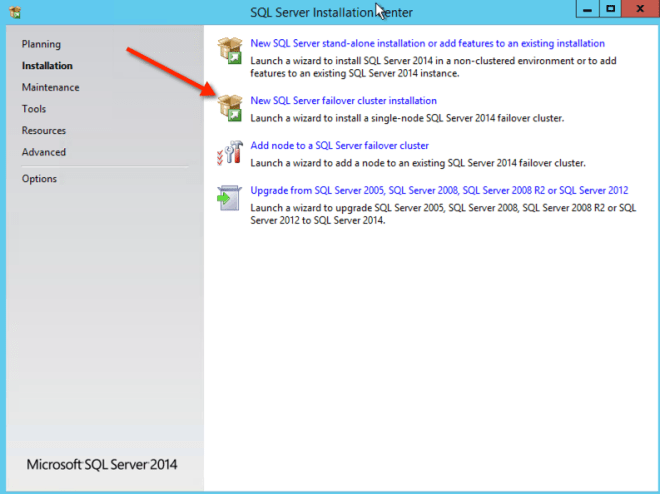
Install the first cluster node
You are now ready to install your first node. The cluster installation will proceed just like any other SQL cluster that you have ever built. I have not copied ever screen shot, just a few to guide you along the way.
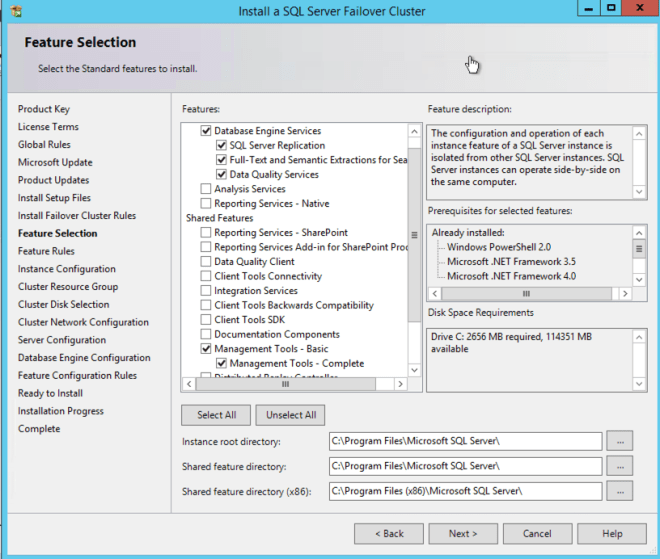
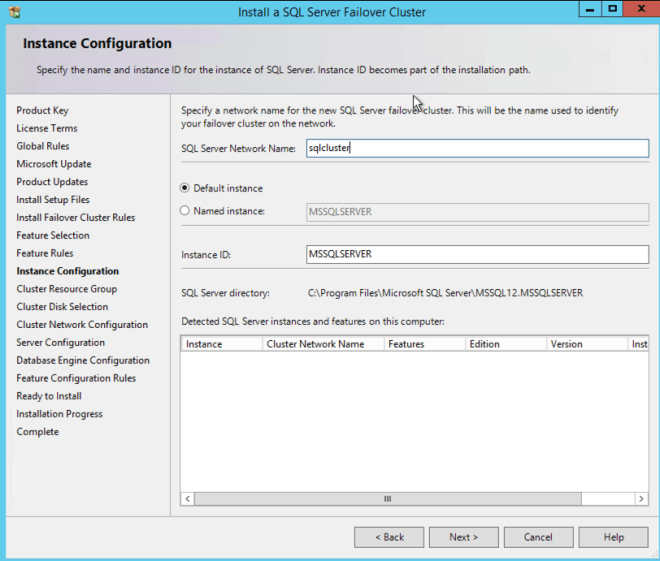
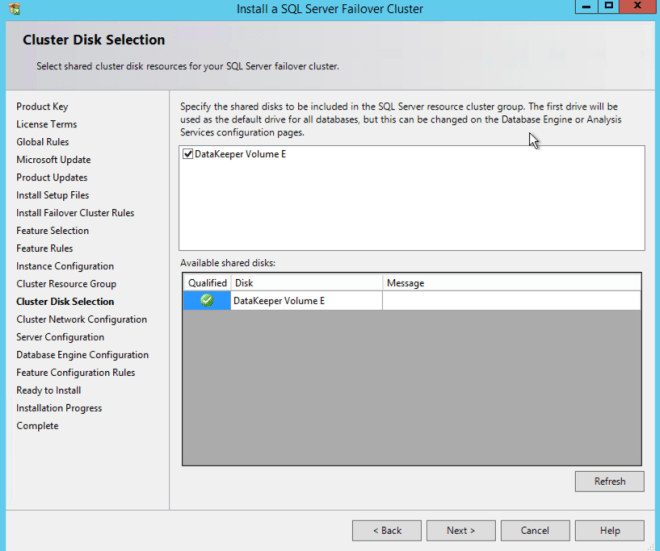
You see that the DataKeeper Volume Resource is recognized as an available disk resource, just as if it were a shared disk.
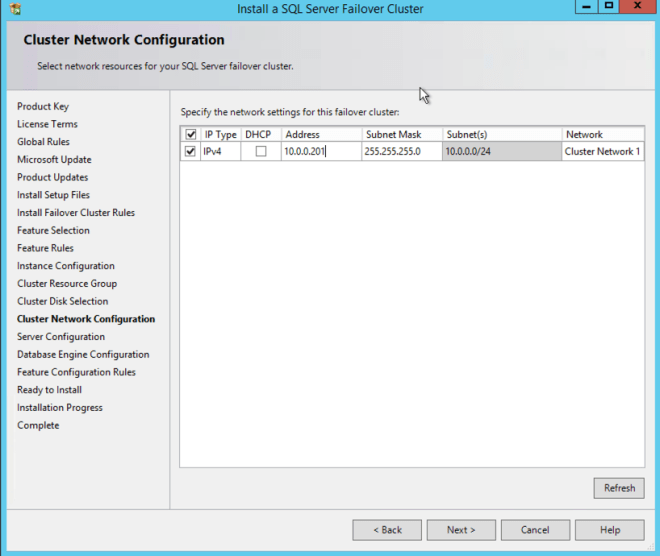
Make note of the IP address you select here. It must be a unique IP address on your network. We will use this same IP address later when we create our Internal Load Balancer.
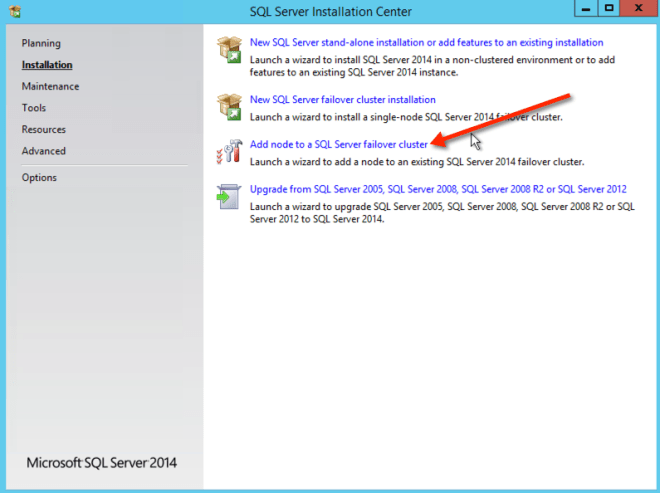
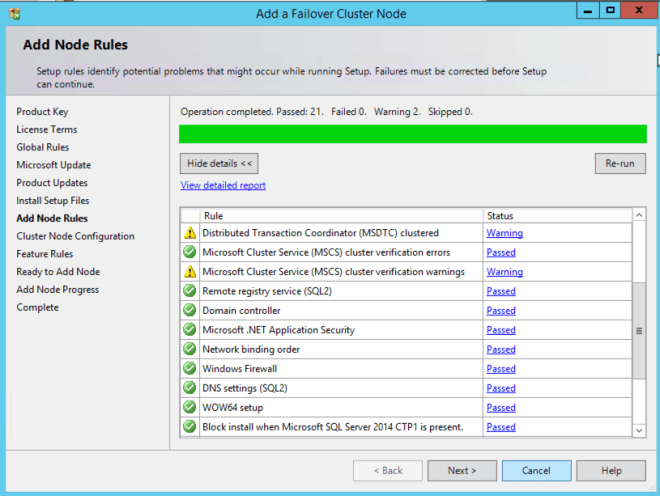
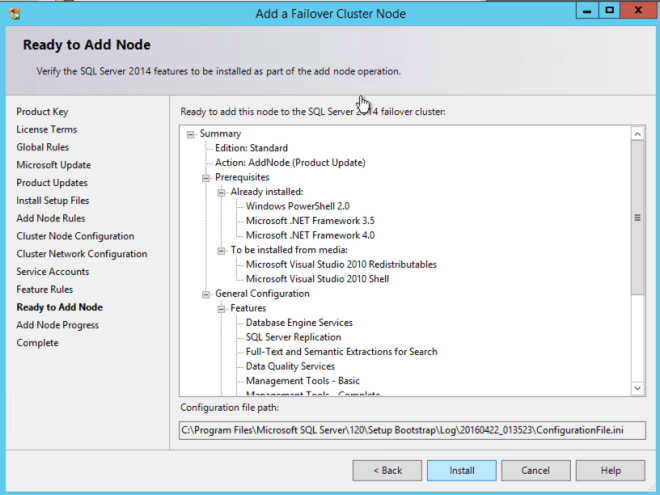
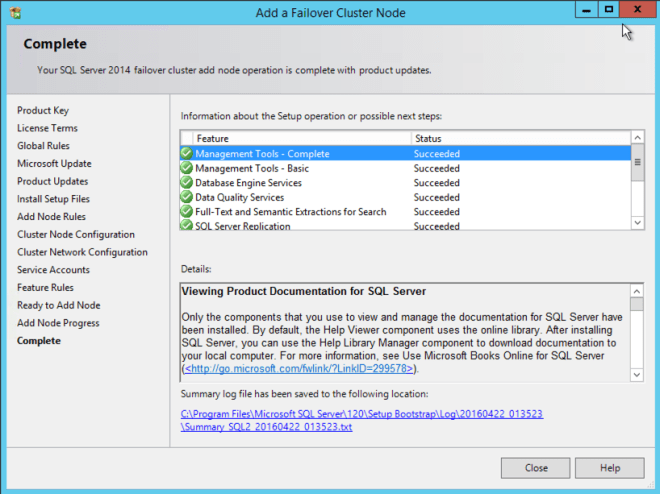
Add the second node
After the first node installs successfully, you will start the installation on the second node using the “Add node to a SQL Server failover cluster” option. Once again, the install is pretty straight forward, just use standard best practices as you would any other SQL cluster installation.
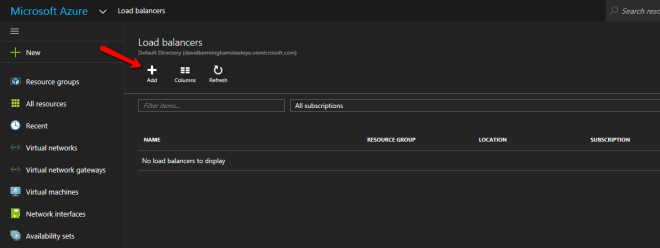
Create the Internal Load Balancer
Here is where failover clustering in Azure is different than traditional infrastructures. The Azure network stack does not support gratuitous ARPS, so clients cannot connect directly to the cluster IP address. Instead, clients connect to an internal load balancer and are redirected to the active cluster node. What we need to do is create an internal load balancer. This can all be done through the Azure Portal as shown below.
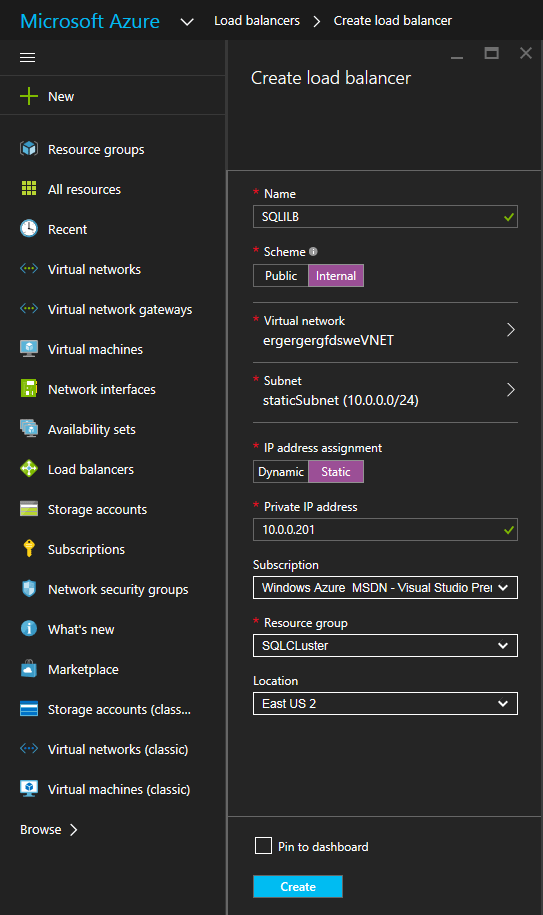
First, create a new Load Balancer
You can use an Public Load Balancer if your client connects over the public internet, but assuming your clients reside in the same vNet, we will create an Internal Load Balancer. The important thing to take note of here is that the Virtual Network is the same as the network where your cluster nodes reside. Also, the Private IP address that you specify will be EXACTLY the same as the address you used to create the SQL Cluster Resource.
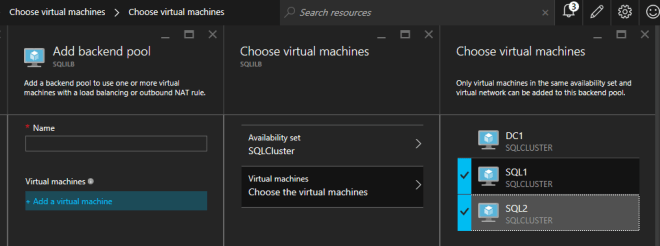
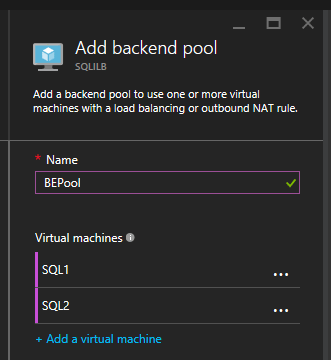
After the Internal Load Balancer (ILB) is created, you will need to edit it. The first thing we will do is to add a backend pool. Through this process you will choose the Availability Set where your SQL Cluster VMs reside. However, when you choose the actual VMs to add to the Backend Pool, be sure you do not choose your file share witness. We do not want to redirect SQL traffic to your file share witness.
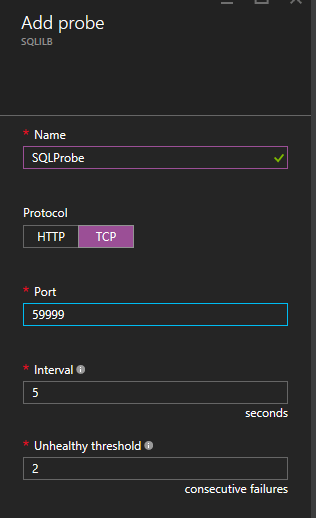
The next thing we will do is add a Probe. The probe we add will probe Port 59999. This probe determines which node is active in our cluster.
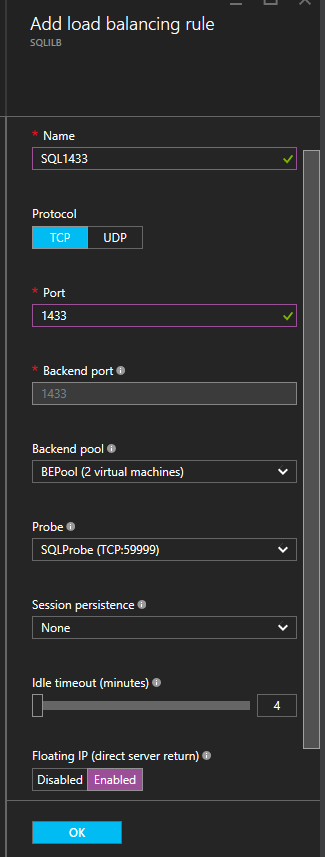
And then finally, we need a load balancing rule to redirect the SQL Server traffic. In our example we used a Default Instance of SQL which uses port 1433. You may also want to add rules for 1434 or others depending upon your applications requirements. The important thing to notice in the screen shot below is the Direct Server Return is Enabled. Make sure you make that change.
Fix the SQL Server IP Resource
The final step in the configuration is to run the following PowerShell script on one of your cluster nodes. This will allow the Cluster IP Address to respond to the ILB probes and ensure that there is no IP address conflict between the Cluster IP Address and the ILB. Please take note; you will need to edit this script to fit your environment. The subnet mask is set to 255.255.255.255, this is not a mistake, leave it as is. This creates a host specific route to avoid IP address conflicts with the ILB.
# Define variables
$ClusterNetworkName = “”
# the cluster network name (Use Get-ClusterNetwork on Windows Server 2012 of higher to find the name)
$IPResourceName = “”
# the IP Address resource name
$ILBIP = “”
# the IP Address of the Internal Load Balancer (ILB)
Import-Module FailoverClusters
# If you are using Windows Server 2012 or higher:
Get-ClusterResource $IPResourceName | Set-ClusterParameter -Multiple @{Address=$ILBIP;ProbePort=59999;SubnetMask="255.255.255.255";Network=$ClusterNetworkName;EnableDhcp=0}
# If you are using Windows Server 2008 R2 use this:
#cluster res $IPResourceName /priv enabledhcp=0 address=$ILBIP probeport=59999  subnetmask=255.255.255.255
Conclusion
You should now have a functioning SQL Server Failover Cluster Instance. If you have ANY problems, please reach out to me on Twitter @daveberm and I will be glad to assist. If you need a DataKeeper evaluation key fill out the form at http://us.sios.com/clustersyourway/cta/14-day-trial and SIOS will send an evaluation key sent out to you.

Could you PLEASE explain how HA cluster handle network sessions during fail-over? Is there some mechanism on cluster site to preserve sessions during fail-over process?
I cannot find any reasonable description of this topic.
I suppose that in Windows HA cluster there is no such mechanism (of course it preserves IP only as cluster resource) but heard opposite opinions. I think that this is application responsibility to re-establish disconnected sessions during fail-over process.
Yes, the application must maintain the session.
Hi Dave, with this solution, do we need to have a SQL license for both nodes?
As I know, if a second node is passive and SQL not running on it, you may not have a licenses for it?
Is it true for Azure VM?
If you have Software Assurance I believe that is true. You should verify with Microsoft to be 100% sure.