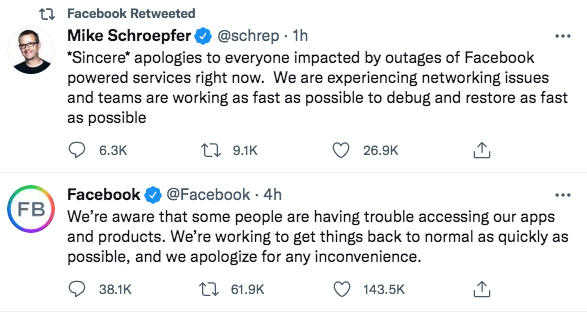
It’s the end of the work day here on the east coast and I see that the Facebook is still unavailable. Facebook acknowledged the problem in the following two Tweets.
I can pinpoint the time that Facebook went offline for me. I was trying to post a comment on a post and my comment was not posting. I was a little annoyed, and almost thought the poster had blocked me, or was deleting my comment. This was at 11:45 am EDT. 5+ hours Facebook for me is still down.
While we don’t know the exact cause of the downtime, and whether it was user error, some nefarious assault, or just an unexpected calamity of errors, we can learn a few things about this outage at this point.
Downtime is expensive
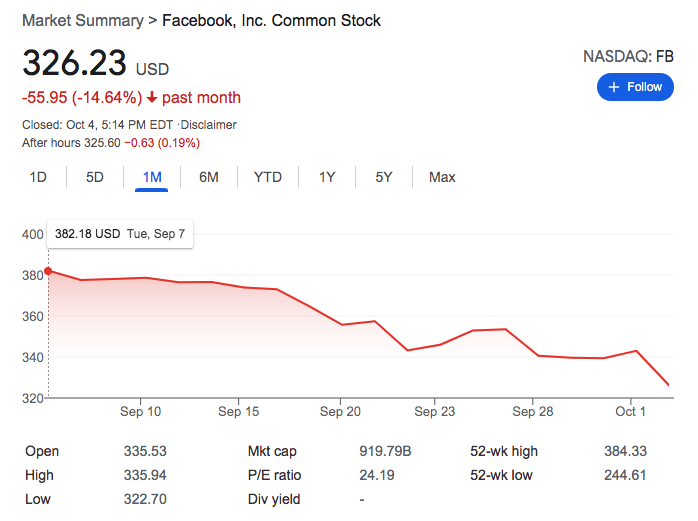
While we may never know the exact cost of the downtime experienced today, there are a few costs that can already measured. As of this writing, Facebook stock went down 4.89% today. That’s on top of an already brutal September for Facebook and other tech stocks.
The correction may have been inevitable, but the outage today certainly didn’t help matters.
But what was the real cost to the company? With many brands leveraging social media as an important part of their marketing outreach, how will this outage impact future advertising spends? Minimally I anticipate advertisers to investigate other social media platforms if they have not done so already. Only time will tell, but even before this outage we have seen more competition for marketing spend from other platforms such as TickTock.
Plan for the worst-case scenario
Things happen, we know that and plan for that. Business Continuity Plans (BCP) should be written to address any possible disaster. Again, we don’t know the exact cause of this particular disaster, but I would have to imaging that an RTO of 5+ hours is not written into any BCP that sits on the shelf at Facebook, Instagram or WhatsApp.
What’s in your your BCP? Have you imagined any possible disaster? Have your measured the impact of downtime and defined adequate recovery time objective (RTO) and recovery point objective (RPO) for each component of your business? I would venture to say that it’s impossible to plan for every possible thing that can go wrong. However, I would advise everyone to revisit your BCP on a regular basis and update it to include disasters that maybe weren’t on the radar the last time you reviewed your BCP. Did you have global pandemic in your BCP? If not, you may have been left scrambling to accomodate a “work from home” workforce. The point is, plan for the worst and hope for the best.
Communications in a disaster
Communications in the event of a disaster should be its own chapter in your BCP.
One Facebook employee told Reuters that all internal tools were down. Facebook’s response was made much more difficult because employees lost access to some of their own tools in the shutdown, people tracking the matter said.
Multiple employees said they had not been told what had gone wrong.
A truly robust BCP must include multiple fallback means of communication. This becomes much more important as your business spreads out across multiple building, regions or countries. Just think about how your team communicates today. Phone, text, email, Slack might be your top four. But what if they are all unavailable, how would you reach your team? If you don’t know you may want to start investigating other options. You may not need a shortwave radio and a flock of carrier pigeons, but I’m sure there is a government agency that keeps both of those on hand for a “break glass in case of emergency” situation.
Summary
You have a responsibility to yourself, your customers and your investors to make sure you take every precaution concerning the availability of your business. Make sure you invest adequate resources in creating your BCP and that the teams responsible for business continuity have the tools they need to ensure they can do their part in meeting the RTO and RPO defined in your BCP.
They are multiple options to implement HADR solution for SQL Server in AWS public cloud. The easiest way to do that is to use AWS Database as a Service (DBaaS) product known as AWS RDS and enable Multi-AZ option using your AWS Control Panel (Fig #1).
Fig #1
That is all it takes to roll out or add it to an existing instance. AWS will take care of the rest under the hood (depending on your SQL Server version, it might use Mirroring or Always On Availability Groups). It will provision all the necessary things for an automatic failover (witness, network, storage, etc…), so when a primary node will go down, it will be replaced with a secondary node. No ifs and no buts. This blog post is going to discuss how to build your own HADR solution using multiple AWS EC2s (BYOC) instead of a managed AWS…
When ensuring high availability for SAP ASCS and ERS running on WIndows Server, the primary cluster solution you will want to use is Windows Server Failover Clustering. However, when doing this in AWS you will quickly discover that there are a few obstacles you need to know how to overcome when deploying this in AWS.
I recently wrote this Step-by-Step guide that was published on the SAP blog that walks you through the entire process. If you have any questions, please leave a comment.
I often help people automate the configuration of their infrastructure so they can build 3-node clusters that span Availability Zones and Regions. The CLI for creating a DataKeeper Job and associated mirrors that contain more than one target can be a little confusing, so I’m documenting it here in case you find yourself looking for this information. The DataKeeper documentation describes this as a Mirror with Multiple Targets.
The environment in this example looks like this:
PRIMARY (10.0.2.100) – in AZ1 SECONDARY (10.0.3.100) – in AZ2 DR (10.0.1.10) – in a different Region
I want to create a synchronous mirror from PRIMARY to SECONDARY and an asynchronous mirror from PRIMARY to DR. I also have to make sure the DataKeeper Job knows how to create a mirror from SECONDARY to DR in case the SECONDARY or DR server ever become the source of the mirror. EMCMD will be used to create this multiple target mirror.
We need to first create the Job that contains all this possible endpoints and define whether the mirror will be Sync (S) or Async (A) between those endpoints.
emcmd . createjob ddrive sqldata
primary.datakeeper.local D 10.0.2.100 secondary.datakeeper.local D 10.0.3.100 S
primary.datakeeper.local D 10.0.2.100 dr.datakeeper.local D 10.0.1.10 A
secondary.datakeeper.local D 10.0.3.100 dr.datakeeper.local D 10.0.1.10 A
That single “createjob” command creates the Job. It might be a little easier to look at that command like this:
emcmd . createjob ddrive sqldata
primary.datakeeper.local D 10.0.2.100 secondary.datakeeper.local D 10.0.3.100 S
primary.datakeeper.local D 10.0.2.100 dr.datakeeper.local D 10.0.1.10 A
secondary.datakeeper.local D 10.0.3.100 dr.datakeeper.local D 10.0.1.10 A
Next we need to create the mirrors.
emcmd 10.0.2.100 createmirror D 10.0.1.10 A
emcmd 10.0.2.100 createmirror D 10.0.3.100 S
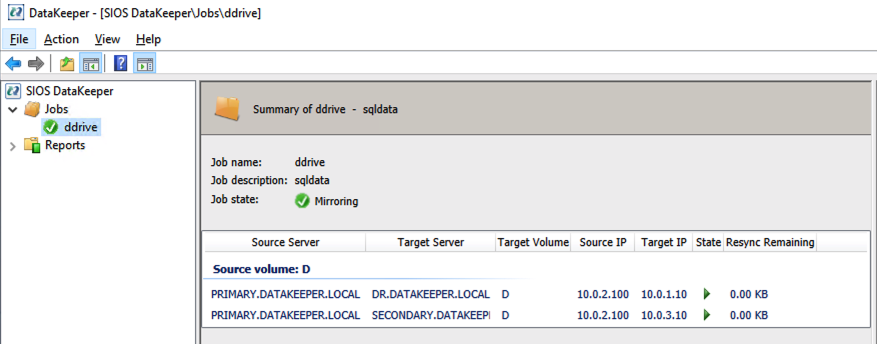
Our DataKeeper Job should now look like this in the DataKeeper UI
One-to-many DataKeeper Replicated Volume
And then finally we can register the DataKeeper Volume Resource in the cluster Available Storage with this command.
emcmd . registerclustervolume D
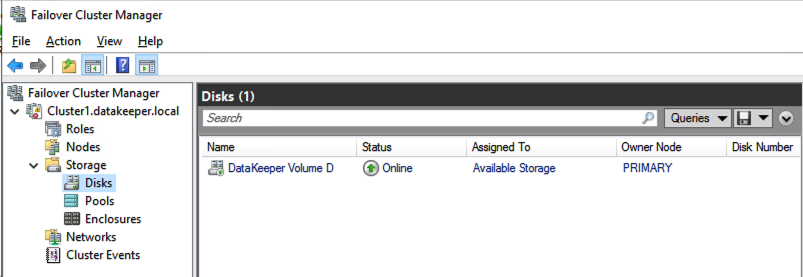
The DataKeeper Volume Resource will now appear in Available Storage as shown below.
DataKeeper Volume in Available Storage
You are now ready to install SQL Server, SAP, File Server or any other clustered resource you normally protect with Windows Server Failover Clustering.
I get asked this question all the time, so I figured it was time to write a blog post, record a video and write some code to automate the process so that it completes in under a minute.
First, some background. Typically when someone asks me how to do this, I point them to the DataKeeper documentation.
This first document talks about extending the cluster and adding a 3rd node to the existing cluster. That’s fine if your cluster supports three nodes, but if you are using SQL Server Standard Edition, Microsoft limits you to a 2-node cluster. In the case of a 2-node cluster you can still replicate to a 3rd node, but the recovery will be more of a manual process. This process is described here.
People typically read these instructions and get a little worried. They feel like they would be performing open heart surgery on their cluster. It really is more like changing your shirt! You are simply replacing the Cluster Disk resource with a DataKeeper Volume resource. As you’ll see in the video below the process takes just a few seconds.
After you run that code don’t forget you also need to click on Manage Shared Volumes to add the backup node to the DataKeeper job as shown in the video.
If you have SQL Server Enterprise Edition then the final step would be to install SQL Server in the DR node and choose add node to existing cluster.
If you are using SQL Server Standard Edition then your job is done. You would simply follow these instructions to access you data on the 3rd node and then mount the replicated databases.
These directions are applicable whether your DR node is in the Cloud or your own DR site.
Here is a short but sweet post on how to change the drive letter of a partition. Despite using my best Google skills I couldn’t find an example that was doing it for me. I rolled up my sleeves and just figured it out on my own. I hope this helps someone out there.
Set-Partition -DiskNumber 4 -PartitionNumber 1 -NewDriveLetter X
As long as you know the DiskNumber and PartitionNumber this will immediately change the drive letter of the partition you specify.
You may also need to import the Storage module into Powershell before you can do this.
If you are considering deploying your own Microsoft SQL Server instances in AWS EC2 you have some decisions to make regarding the resiliency of the solution. Sure, AWS will offer you a 99.99% SLA on your Compute resources if you deploy two or more instances across different availability zones. But don’t be fooled, there are a lot of other factors you need to consider when calculating your true application availability. I recently blogged about how to calculate your application availability in the cloud. You probably should have a quick read of that article before you move on.
When it comes to ensuring your Microsoft SQL Server instance is highly available, it really comes down to two basic choices: Always On Availability Group (AG) or SQL Server Failover Cluster Instance (FCI). If you are reading this article I’m making an assumption you are well aware of both of these options and are seriously considering using a SQL Server FCI instead of a SQL Server Always On AG.
Benefits of a Microsoft SQL Server Failover Cluster Instance
The following list summarize what AWS says are the benefits of a SQL Server FCI:
FCI is generally preferable over AG for SQL Server high availability deployments when the following are priority concerns for your use case:
License cost efficiency: You need the Enterprise Edition license of SQL Server to run AGs, whereas you only need the Standard Edition license to run FCIs. This is typically 50–60% less expensive than the Enterprise Edition. Although you can run a Basic version of AGs on Standard Edition starting from SQL Server 2016, it carries the limitation of supporting only one database per AG. This can become a challenge when dealing with applications that require multiple databases like SharePoint.
Instance-level protection versus database-level protection: With FCI, the entire instance is protected – if the primary node becomes unavailable, the entire instance is moved to the standby node. This takes care of the SQL Server logins, SQL Server Agent jobs, certificates, etc. that are stored in the system databases, which are physically stored in shared storage. With AG, on the other hand, only the databases in the group are protected, and system databases cannot be added to an AG – only user databases are allowed. It is the database administrator’s responsibility to replicate changes to system objects on all AG replicas. This leaves the possibility of human error causing the database to become inaccessible to the application.
DTC feature support: If you’re using SQL Server 2012 or 2014, and your application uses Distributed Transaction Coordinator (DTC), you are not able to use an AG as it is not supported. Use FCI in this situation.
Of course, the challenge with building an FCI that spans availability zones is the lack of a shared storage device that is normally required when building a SQL Server FCI. Because the nodes of the cluster are distributed across multiple datacenters, a traditional SAN is not a viable option for shared storage. That leaves us with a two choices for cluster storage: 3rd party storage class resources like SIOS DataKeeper or the new Amazon FSx. Let’s take a look at what you need to know before you make your choice.
Normally 99.99% availability represents the starting point of what is considered “highly available”. This is what AWS promises you for your compute resources when two or more are deployed in different availability zones.
In case you didn’t know the difference between three nines and four nines…
99.9% availability allows for 43.83 minutes of downtime per month
99.99% availability allows for only 4.38 minutes of downtime per month
By hosting your cluster storage on FSx despite your 99.99% compute availability, your overall application availability will be 99.9%. In contrast, EBS volumes that span availability zones, such as in a DataKeeper deployment, qualifies for the 99.99% SLA at both the storage and compute layers, meaning your overall application availability is 99.99%.
Storage Location
When configuring FSx for high availability, you will want to enable multi-AZ support. By enabling multi-AZ you have an effectively have a “preferred” AZ and a “standby” AZ. When you deploy your SQL Server FCI nodes you will want to distribute those nodes across the same AZs.
Now in normal situations, you will want to make sure the active cluster node resides in the same AZ as the preferred FSx storage node. This is to minimize the distance and latency to your storage, but also to minimize the costs associated with data transfer across AZs. As specified in the FSx price guide, “Standard data transfer fees apply for inter-AZ or inter-region access to file systems.”
In the unfortunate circumstance where you have a SQL Server FCI failure, but not a FSx failure, there is no mechanism to tie both the storage and compute together. In the event that FSx fails over, it will automatically fail back to the primary availability zone. However, best practices dictate SQL FCI remain running on the secondary node until root cause analysis is performed and fail back is typically scheduled to occur during maintenance periods. This leaves you in a situation where your storage resides in a different AZ, which will incur additional costs. Currently the cost for transferring data across AZs, both ingress and egress, is $0.01/GB.
Without keeping a close eye on the state of your FSx and SQL Server FCI, you may not even be aware that they are running in different regions until you see the data transfer charge at the end of the month.
In contrast, in a configuration that use SIOS DataKeeper, the storage failover is part of the SQL Server FCI recovery, ensuring that the storage always fails over with the SQL Server instance. This ensures SQL Server is always reading and writing to the EBS volumes that are directly attached to the active node. Keep in mind, DataKeeper will incur a data transfer cost associated with write operations which are replicated between AZs or regions. This data transfer cost can be minimized with the use of compression available in DataKeeper.
Controlling Failover
In an FSx multi-subnet configuration there is a preferred availability zone and a standby availability. Should the FSx file server in the preferred availability zone experience a failure, the file server in the standby AZ will recover. AWS reports that this recovery time takes about 30 seconds with standard shares. With the use of continuously available file shares Microsoft reports this failover time can be closer to 15 seconds. During this failover time, there is a brownout that occurs where reads and writes are paused, but will continue once recovery completes.
FSx multi-site has automatic failback enabled, meaning that for every unplanned failover of FSx, you also have an unplanned failback. In contrast, typically when a SQL Server FCI experience an unplanned failover you would either just leave it running on the secondary or schedule a failback after hours or during the next maintenance period.
SQL Server Analysis Services Cluster Not Supported with FSx
If you want to cluster SSAS, you will need a clustered disk resource like SIOS DataKeeper. The How to Cluster SQL Server Analysis Server white paper clearly states that SMB cannot be used and that cluster drives with drive letters must be used. In contrast, the DataKeeper Volume resource presents itself as a clustered disk and can be used with SSAS.
Summary
While FSx certainly can make sense for typical SMB uses like Windows user files and other non-critical services where 99.9% availability SLA suffices, FSx is an excellent option If you application requires high availability (99.99%) or HA/DR solutions that also span regions, the SIOS DataKeeper is the right fit.
When deploying business critical applications in the cloud you want to make sure they are highly available. The good news is that if you plan properly, you can achieve 99.99% (4-nines) of availability or more. However, calculating your true availability may not be as straightforward as it seems.
When considering availability you must consider the key components that make access to your application possible, which I’ll call the availability chain. Component of the availability chain are:
Compute
Network
Storage
Application
Dependent services
Your application is only as available as your weakest link, and your downtime increases exponentially with each additional link you add to the chain. Let’s examine each of the links.
Compute Availability
Each of the three major cloud service providers have some similarities. One thing in common across all three platforms is the service level agreements (SLA) they will commit to for compute.
The SLA for all three public cloud providers for VMs when you have two or more VMs configured across different availability zones is 99.99%. Keep in mind, this SLA only guarantees the remote accessibility of one of the VMs at any given time, it makes no promises as to the availability of the services or application(s) running inside the VM. If you deploy a single VM within a single datacenter, this SLA varies from “90% of each hour” (AWS) to 99.5% (Azure and GCP) or 99.9% (Azure single VM when using Premium SSD).
True high availability starts at 99.99%, so the first step is to ensure your application is available is to make sure the application is distributed across two or more VMs that span availability zones. With two VMs spread across two availability zones, giving you 99.99% availability of at least one of those VMs, you could theorize that if you had three VMs spread across three availability zones your availability would be even greater than 99.99%. Although the cloud providers’ SLA will never guarantee beyond 99.99% availability regardless of the number of availability zones in use, if you use pure statistics you might come to the conclusion that your availability could jump to as high as 99.999999% or 8-nines of availability, 26.30 milliseconds downtime per month.
1-(.0001*.0001) = .99999999
99.999999% availability with three availability zones?
Don’t go around quoting that number, but just keep in mind that it makes sense that if two availability zones can give you 99.99% availability, it stands to reason that three availability zones is going to give you something significantly more than 99.99% availability.
Compute is just one link in the availability chain. We still have to address network, storage and other dependent services, which all represent possible points of failure.
Network Availability
In order for your application to be available, every network hop between the client and the application and all the resources that the application depends on, must be available and working within tolerable latency ranges. You need to understand the network links between database servers, application servers, web servers and clients to know precisely where the network might fail. And remember, the more links in your availability chain the lower your overall availability will be.
Although network availability betweens VMs in the same vNet are covered under the standard compute SLA, there are other network services that you may be utilizing. Here are just a few examples of network services you could be utilizing which would impact overall application availability.
It seems pretty clear that Azure and Google are giving you a 99.9% SLA on block storage solutions. AWS doesn’t mention EBS specifically here. They only talk about VMs and measure their single instance VMs availability by the hour instead of by the month as the other cloud providers do. For sake of discussion, lets use the 99.9% availability guarantee that both Azure and GCP have published.
Building upon our previous example, let’s add some storage to the equation.
99.99% compute availability
99.99% load balancer availability
99.9% managed disk
.9999 * .9999 * .999 = .9988
99.88% availability = ~53 minutes of downtime per month.
53 minutes of downtime is a lot more than the 9 minutes of downtime we calculated in our previous example. What can we do to minimize the impact of the 99.9% storage availability? We have to build more redundancy in the storage!
Fortunately, we usually include storage redundancy when planning for application availability. For instance, when we stand up web servers, each web server will typically store data on the locally attached disk. When deploying domain controllers, Microsoft Active Directory takes care of replicating AD information across all the domain controllers. In the case of something like SQL Server, we leverage things Always On Availability Groups or SIOS DataKeeper to keep the data in sync across locally attached disks.
The more copies of the data we have distributed across different availability zones, the more likely we will be able to survive a failure.
For example, an application that stores its data across two different disks in different availability zones will benefit from the redundancy and instead of 99.9% availability it is more likely to achieve 99.9999% availability of the storage.
1 – (.001 * .001) = .999999
If we throw that into the previous equation the picture starts to look a little brighter.
.9999 * .9999 * .999999 = .9998
99.98% availability = ~9 minutes of downtime
By duplicating the data across multiple AZs, and therefore multiple disks, we have effectively mitigated the downtime associated with cloud storage.
Application and Dependent Services Availability
You’ve done all you can do to ensure compute, network, and storage availability. But what about the application itself? Some applications can scale out and provide redundancy by load balancing between multiple instances of the same application. Think of your typical web server farm where you may typically load balance web requests between five servers. If you lose one server the load balancer simply removes it from it’s rotation until it is once again responsive.
Other applications require a little more care and monitoring. Take SQL Server for instance. Typically Always On Availability Groups or Failover Cluster Instances are used to monitor database availability and take recovery actions should a database become unresponsive due to application or system level failures. While there is no published SLA for SQL Server availability solutions, it is commonly accepted that when configured properly for high availability, a SQL Server can provide 99.99% availability.
You may rely on other cloud based services, like hosted Active Directory, hosted DNS, microservices, or even the availability of the cloud portal itself should all be factored into your overall availability equation.
Summary
Application availability is the sum of all the moving parts. Skimping in just one area can exponentially impact the overall availability of your application. Take your time and investigate all the links in your availability chain for weakness including compute, network, storage, application and dependent services.
In general the numbers presented here are hopefully worst case scenarios and your actual availability should exceed the published SLAs. Do your homework and be wary of any service that can not guarantee 99.99% availability, the typical threshold of what is considered highly available.
Human error and security were not addressed in this article. You can make your application as highly available as possible, but if you have not taken steps to secure your application against external threats and stupid human mistakes then all bets are off when it comes to availability.
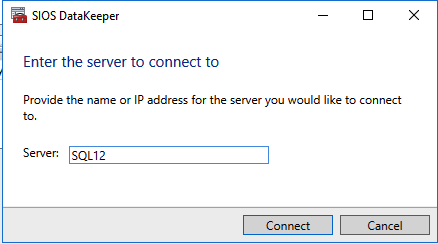
I recently helped someone build an iSCSI target server cluster in Azure and realized that I never wrote a step-by-step guide for that particular configuration. So to remedy that, here are the step-by-step instructions in case you need to do this yourself.
Pre-requisites
I’m going to assume you are fairly familiar with Azure and Windows Server, so I’m going to spare you some of the details. Let’s assume you have at least done the following as a pre-requisite
Provision two servers (SQL1, SQL2) each in a different Availability Zone (Availability Set is also possible, but Availability Zones have a better SLA)
Assign static IP addresses to them through the Azure portal
Joined the servers to an existing domain
Enabled the Failover Clustering feature and the iSCSI Target Server feature on both nodes
Add three Azure Premium Disk to each node. NOTE: this is optional, one disk is the minimum required. For increased IOPS we are going to stripe three Premium Azure Disks together in a storage pool and create a simple (RAID 0) virtual disk
SIOS DataKeeper is going to be used to provided the replicated storage used in the cluster. If you need DataKeeper you can request a trial here.
Create local Storage Pool
Once again, this step is completely optional, but for increased IOPS we are going to stripe together three Azure Premium Disks into a single Storage Pool. You might be tempted to use Dynamic Disk and a spanned volume instead, but don’t do that! If you use dynamic disks you will find out that there is some general incompatibility that will prevent you from creating iSCSI targets later.
Don’t worry, creating a local Storage Pool is pretty straight forward if you are aware of the pitfalls you might encounter as described below. The official documentation can be found here.
Pitfall #1 – although the documentation says the minimum size for a volume to be used in a storage pool is 4 GB, I found that the P1 Premium Disk (4GB) was NOT recognized. So in my lab I used 16GB P3 Premium Disks.
Pitfall #2 – you HAVE to have at least three disks to create a Storage Pool.
Pitfall #3 – create your Storage Pool before you create your cluster. If you try to do it after you create your cluster you are going to wind up with a big mess as Microsoft tries to create a clustered storage pool for you. We are NOT going to create a clustered storage pool, so avoid that mess by creating your Storage Pool before you create the cluster. If you have to add a Storage Pool after the cluster is created you will first have to evict the node from the cluster, then create the Storage Pool.
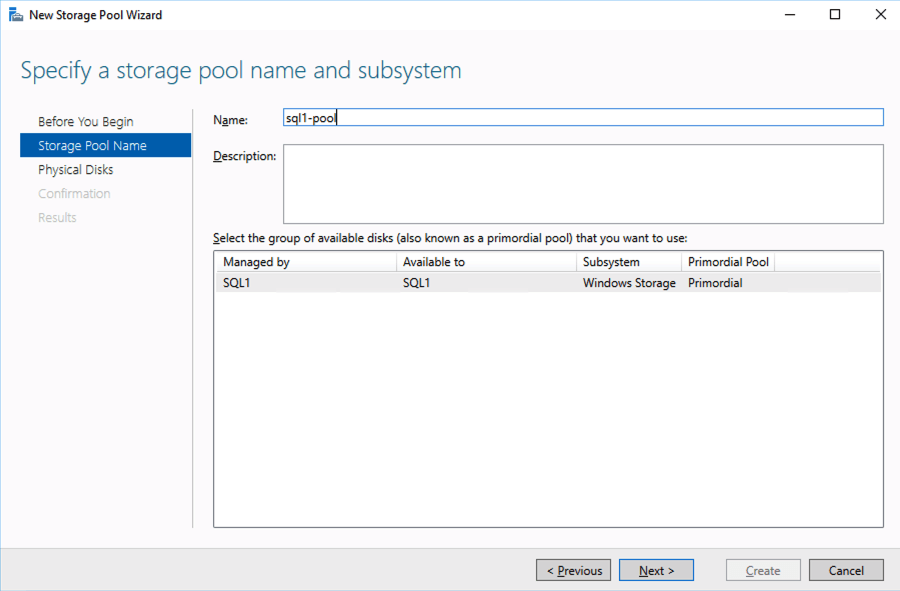
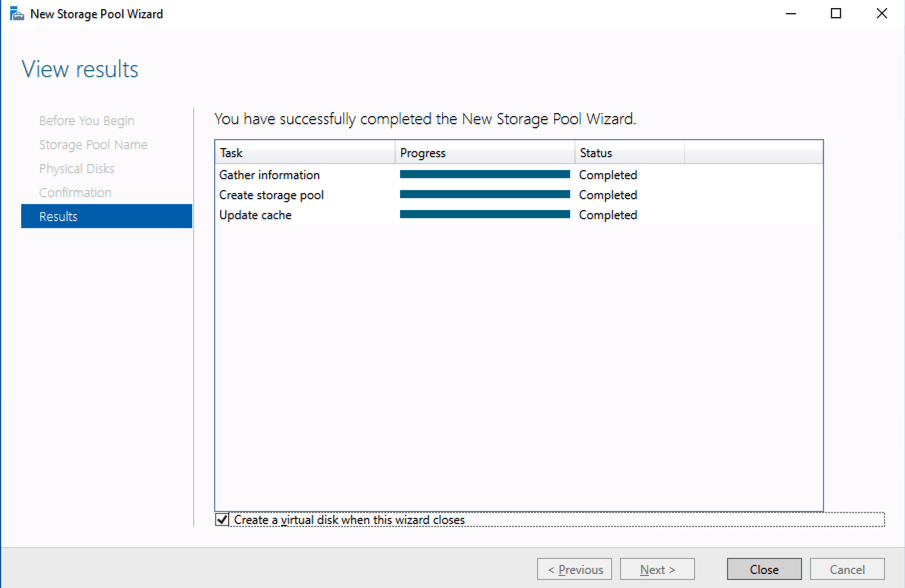
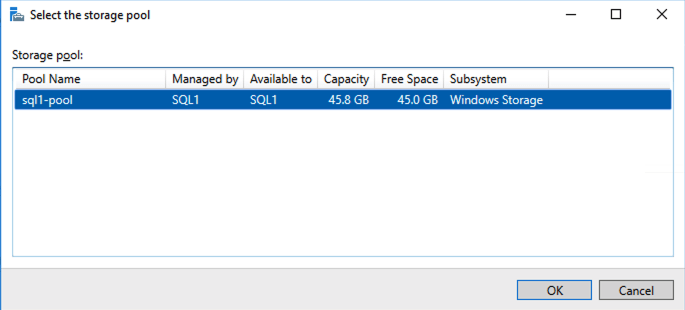
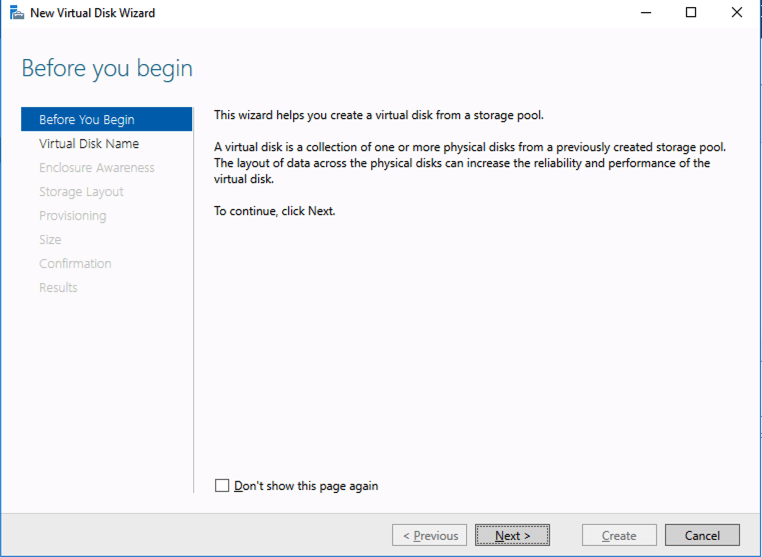
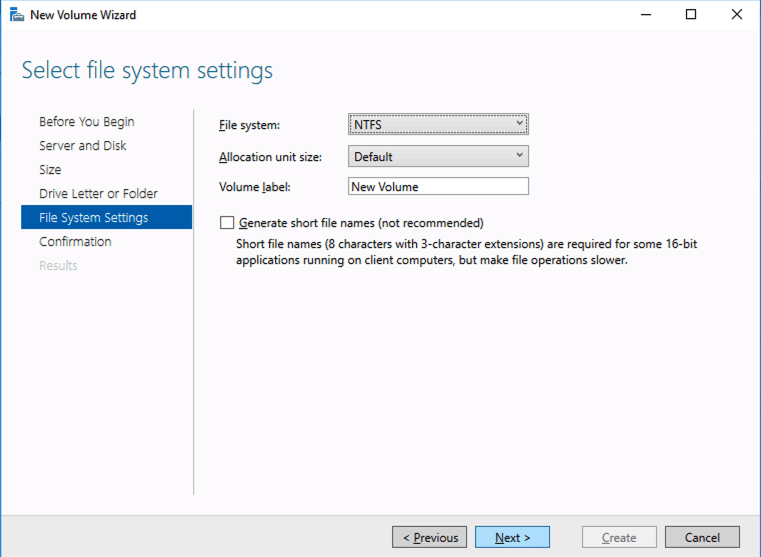
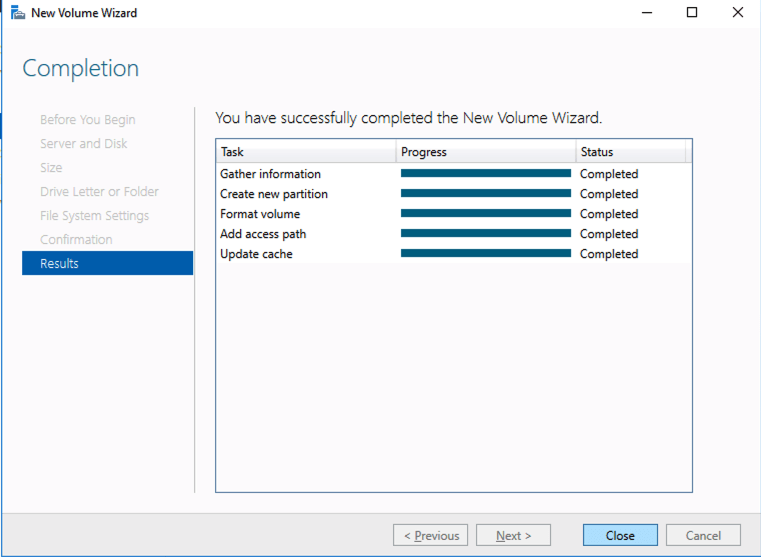
Based on the documentation found here, below are the screenshots that represent what you should see when you build your local Storage Pool on each of the two cluster nodes. Complete these steps on both servers BEFORE you build the cluster.
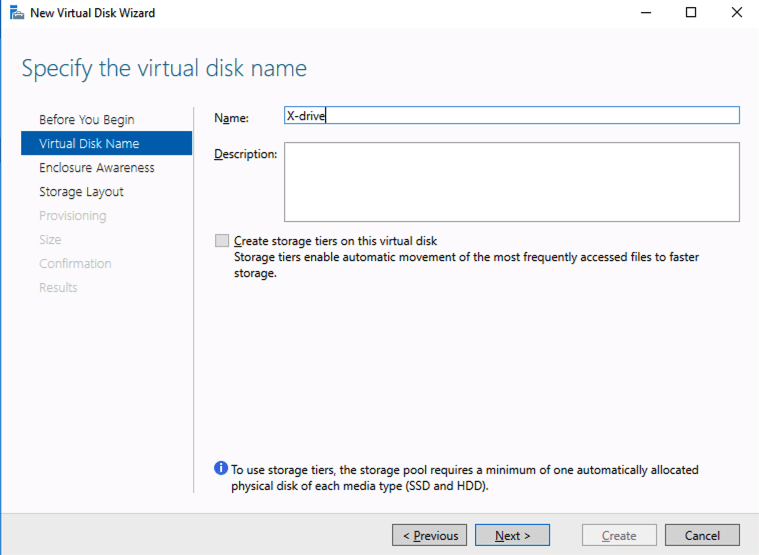
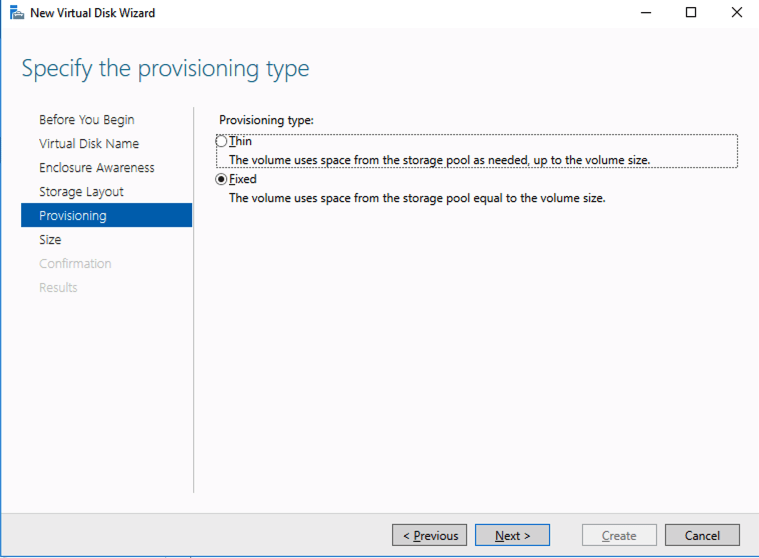
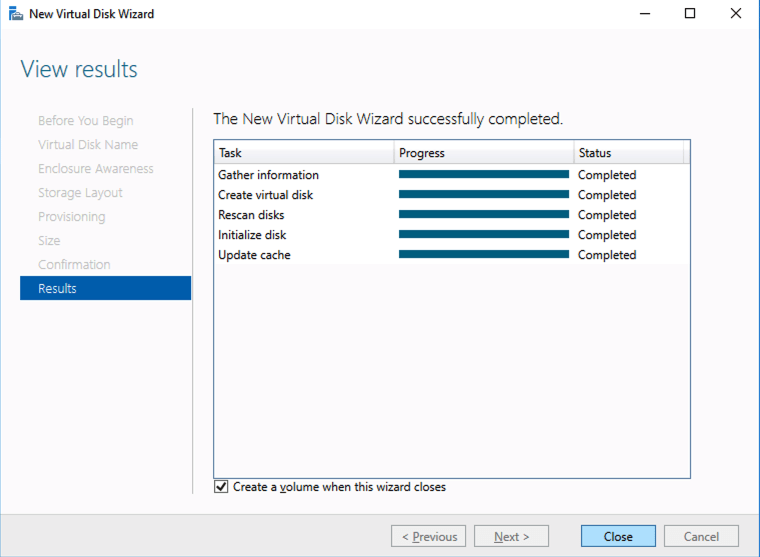
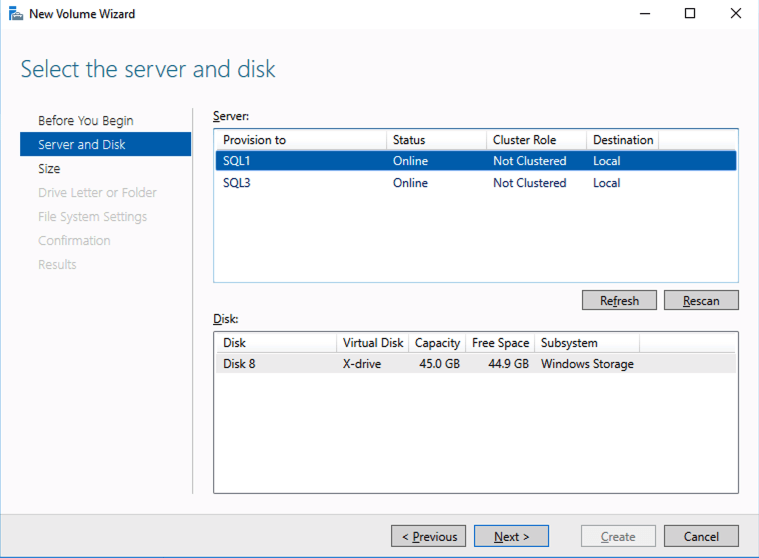
You should see the Primordial pool on both servers.Right-click and choose New Storage Pool…Choose Create a virtual disk when this wizard closesNotice here you could create storage tiers if you decided to use a combination of Standard, Premium and Ultra SSDFor best performance use Simple storage layout (RAID 0). Don’t be concerned about reliability since Azure Managed Disks have triple redundancy on the backend. Simple is required for optimal performance.For performance purposes use Fixed provisioning. You are already paying for the full Premium disk anyway, so no need not to use it all.Now you will have a 45 GB X drive on your first node. Repeat this entire process for the second node.
Create your Cluster
Now that each server each have their own 45 GB X drive, we are going to create the basic cluster. Creating a cluster in Azure is best done via Powershell so that we can specify a static IP address. If you do it through the GUI you will soon realize that Azure assigns your cluster IP a duplicate IP address that you will have to clean up, so don’t do that!
Here is an example Powershell code to create a new cluster.
PS C:\Users\dave.DATAKEEPER> New-Cluster -Name mycluster -NoStorage -StaticAddress 10.0.0.100 -Node sql1, sql2
WARNING: There were issues while creating the clustered role that may prevent it from starting. For more information view the report file below.
WARNING: Report file location: C:\windows\cluster\Reports\Create Cluster Wizard mycluster on 2020.05.20 At 16.54.45.htm

Name
----
mycluster
The warning in the report will tell you that there is no witness. Because there is no shared storage in this cluster you will have to create either a Cloud Witness or a File Share Witness. I’m not going to walk you through that process as it is pretty well documented at those links.
Don’t put this off, go ahead and create the witness now before you move to the next step!
You now should have a basic 2-node cluster that looks something like this.
Configure a Load Balancer for the Cluster Core IP Address
Clusters in Azure are unique in that the Azure virtual network does not support gratuitous ARP. Don’t worry if you don’t know what that means, all you have to really know is that cluster IP addresses can’t be reached directly. Instead, you have to use an Azure Load Balancer, which redirects the client connection to the active cluster node.
There are two steps to getting a load balancer configured for a cluster in Azure. The first step is to create the load balancer. The second step is to update the cluster IP address so that it listens for the load balancer’s health probe and uses a 255.255.255.255 subnet mask which enables you to avoid IP address conflicts with the ILB.
We will first create a load balancer for the cluster core IP address. Later we will edit the load balancer to also address the iSCSI cluster resource IP address that we will be created at the end of this document.
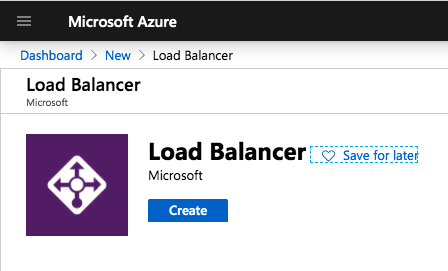
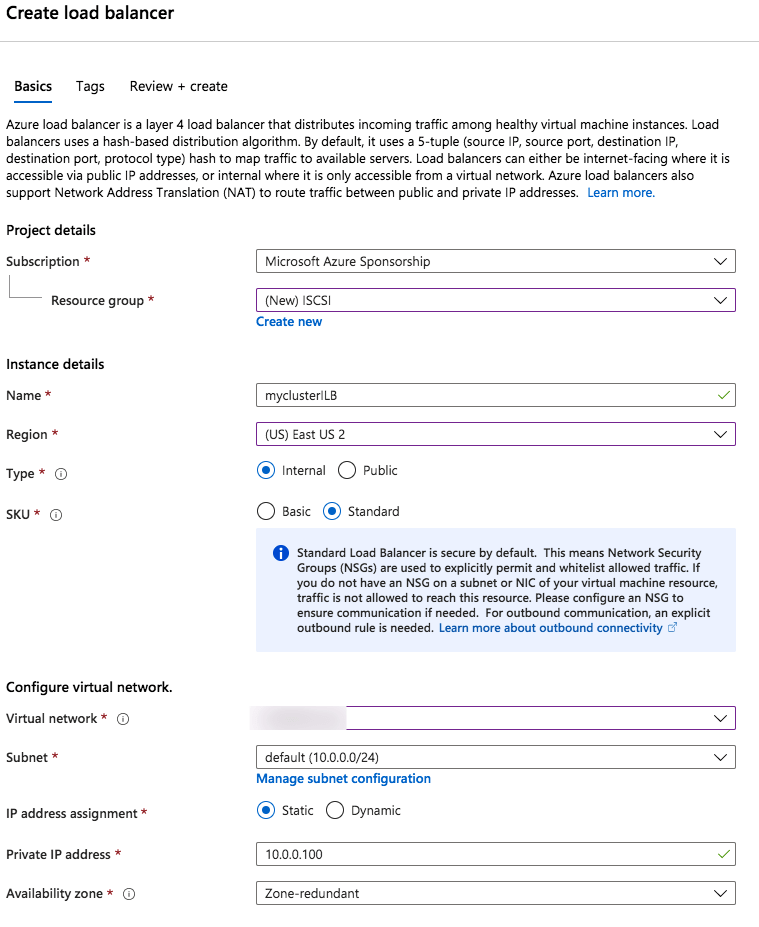
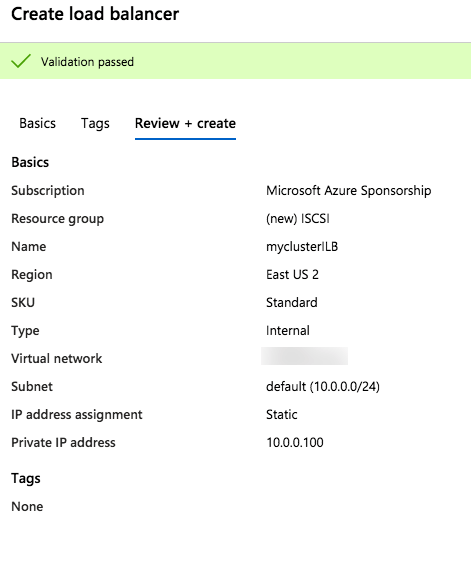
Step 1 – Create a Standard Load Balancer
Notice that the static IP address we are using is the same address that we used to create the core cluster IP resource.
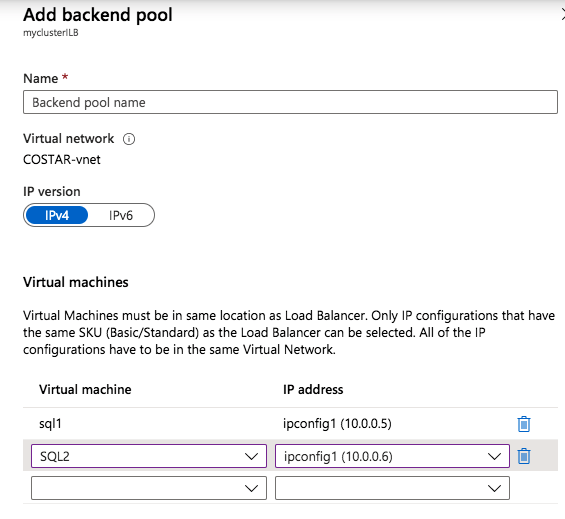
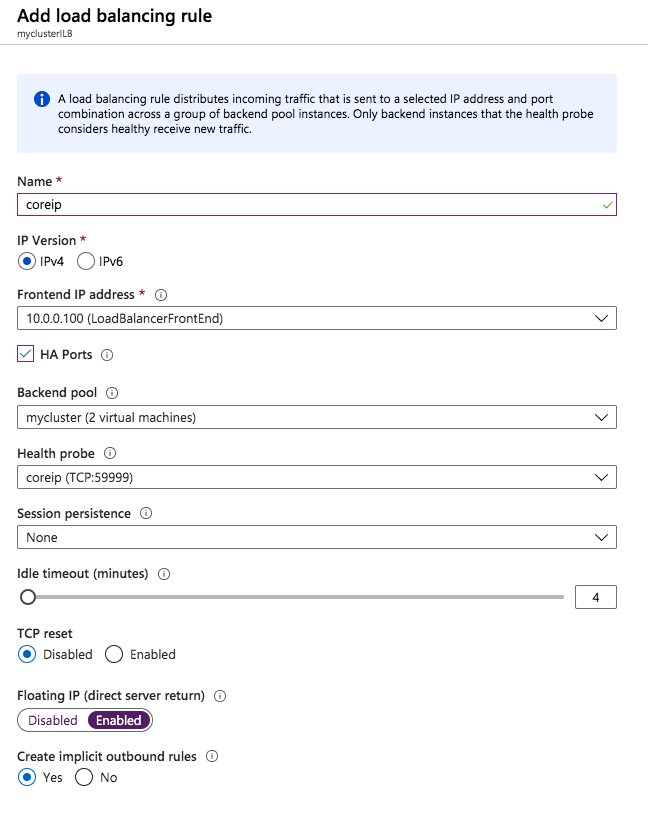
Once the load balancer is created you will edit the load balancer as shown below
Add the two cluster nodes to the backend poolAdd a health probe. In this example we use 59999 as the port. Remember that port, we will need it in the next step.Create a new rue to redirect all HA ports, Make sure Floating IP is enabled.
Step 2 – Edit to cluster core IP address to work with the load balancer
As I mentioned earlier, there are two steps to getting the load balancer configured to work properly. Now that we have a load balancer, we have to run a Powershell script on one of the cluster nodes. The following is an example script that needs to be run on one of the cluster nodes.
The important thing about the script above, besides getting all the variables correct for your environment, is making sure the ProbePort is set to the same port you defined in your load balancer settings for this particular IP address. You will see later that we will create a 2nd health probe for the iSCSI cluster IP resource that will use a different port. The other important thing is making sure you leave the subnet set at 255.255.255.255. It may look wrong, but that is what it needs to be set to.
After you run it the output should look like this.
 PS C:\Users\dave.DATAKEEPER> $ClusterNetworkName = “Cluster Network 1”
$IPResourceName = “Cluster IP Address”
$ILBIP = “10.0.0.100”
Import-Module FailoverClusters
Get-ClusterResource $IPResourceName | Set-ClusterParameter -Multiple @{Address=$ILBIP;ProbePort=59999;SubnetMask="255.255.255.255";Network=$ClusterNetworkName;EnableDhcp=0}
WARNING: The properties were stored, but not all changes will take effect until Cluster IP Address is taken offline and then online again.
You will need to take the core cluster IP resource offline and bring it back online again before it will function properly with the load balancer.
Assuming you did everything right in creating your load balancer, your Server Manager on both servers should list your cluster as Online as shown below.
Check Server Manager on both cluster nodes. Your cluster should show as “Online” under Manageability.
Install DataKeeper
I won’t go through all the steps here, but basically at this point you are ready to install SIOS DataKeeper on both cluster nodes. It’s a pretty simple setup, just run the setup and choose all the defaults. If you run into any problems with DataKeeper it is usually one of two things. The first issue is the service account. You need to make sure the account you are using to run the DataKeeper service is in the Local Administrators Group on each node.
The second issue is in regards to firewalls. Although the DataKeeper install will update the local Windows Firewall automatically, if your network is locked down you will need to make sure the cluster nodes can communicate with each other across the required DataKeeper ports. In addition, you need to make sure the ILB health probe can reach your servers.
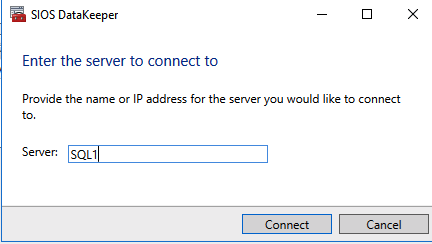
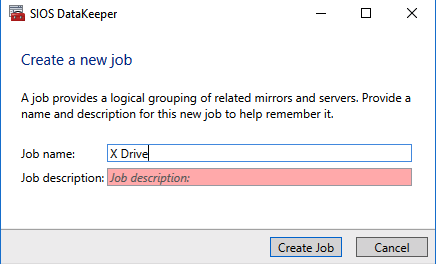
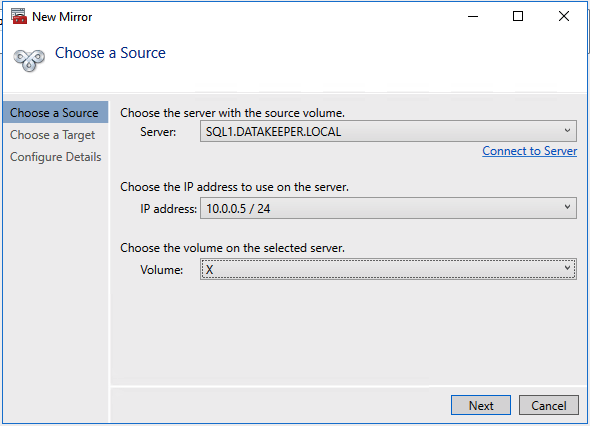
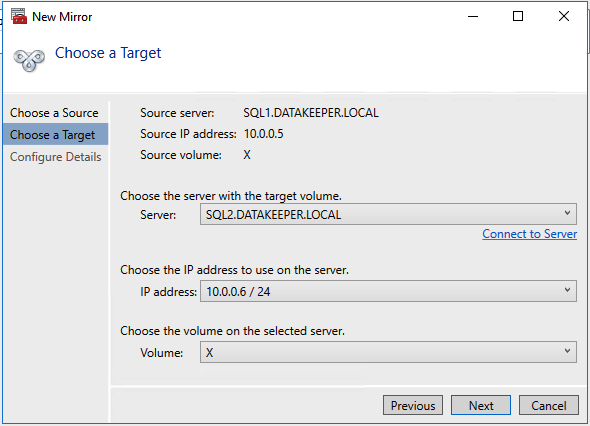
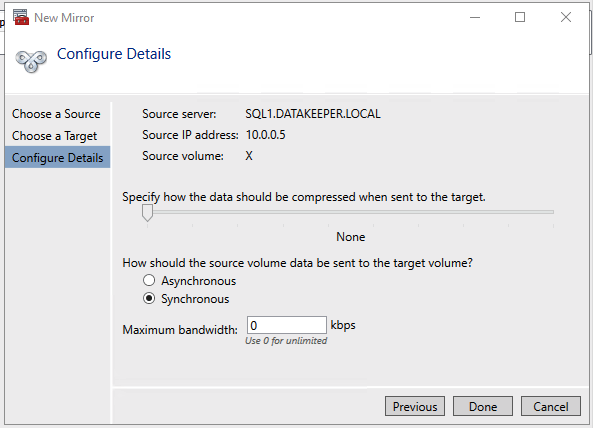
Once DataKeeper is installed you are ready to create your first DataKeeper job. Complete the following steps for each volume you want to replicate using the DataKeeper interface
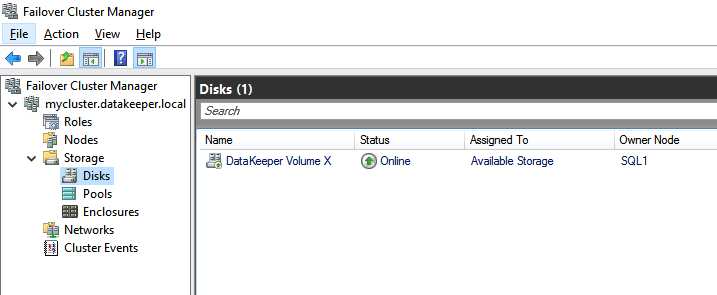
Use the DataKeeper interface to connect to both serversClick on create new job and give it a nameClick Yes to register the DataKeeper volume in the clusterOnce the volume is registered it will appear in Available Storage in Failover CLuster Manager
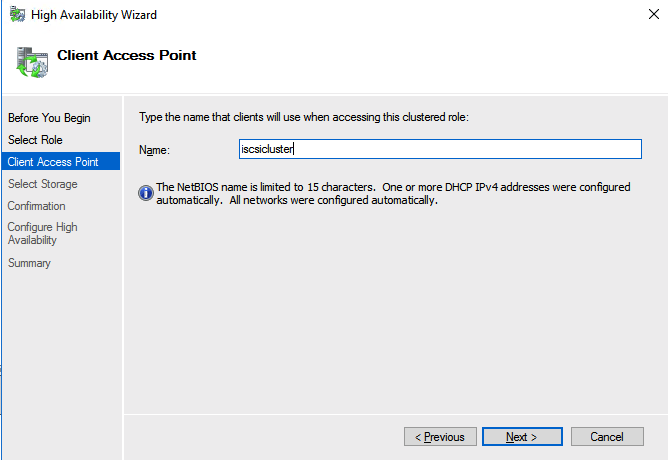
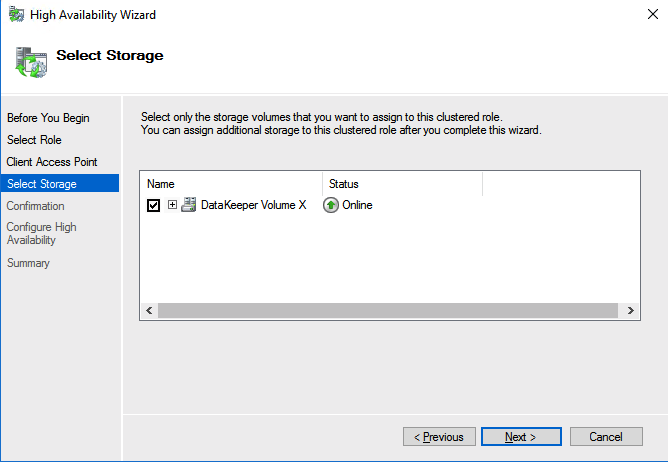
Create the iSCSI target server cluster
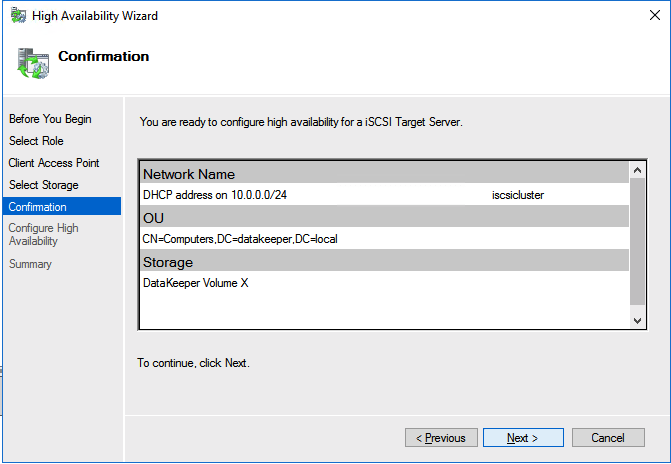
In this next step we will create the iSCSI target server role in our cluster. In an ideal world I would have a Powershell script that does all this for you, but for sake of time for now I’m just going to show you how to do it through the GUI. If you happen to write the Powershell code please feel free to share with the rest of us!
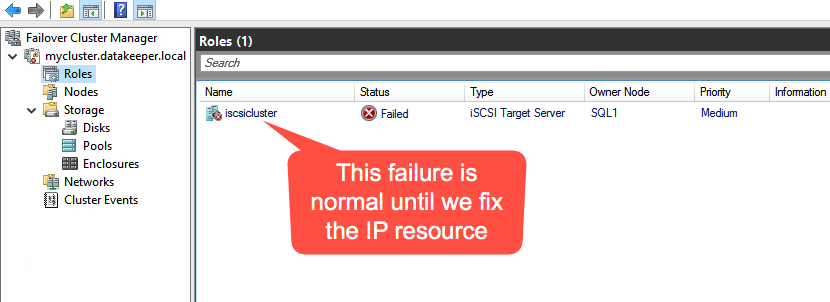
There is one problem with the GUI method. ou will wind up with a duplicate IP address in when the IP Resource is created, which will cause your cluster resource to fail until we fix it. I’ll walk through that process as well.
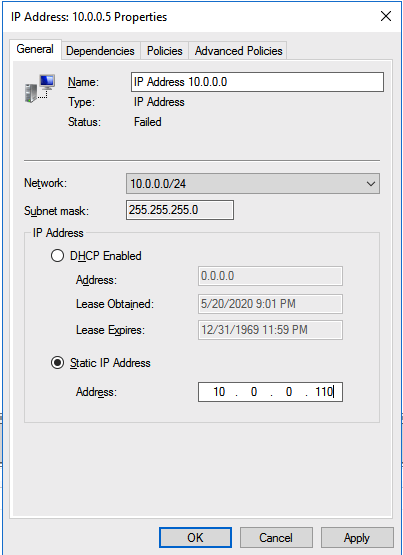
Go to the Properties of the failed IP Address resource and choose Static IP and select an IP address that is not in use on your network. Remember this address, we will use it in our next step when we update the load balancer.
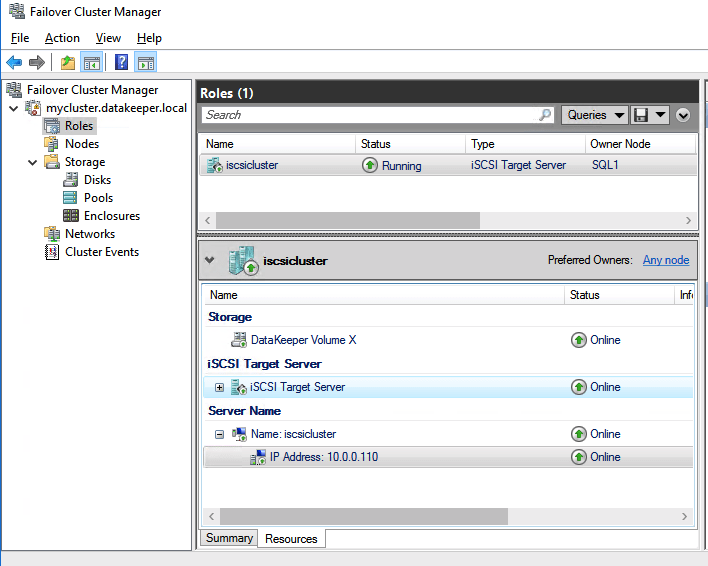
You should now be able to bring the iSCSI cluster resource online.
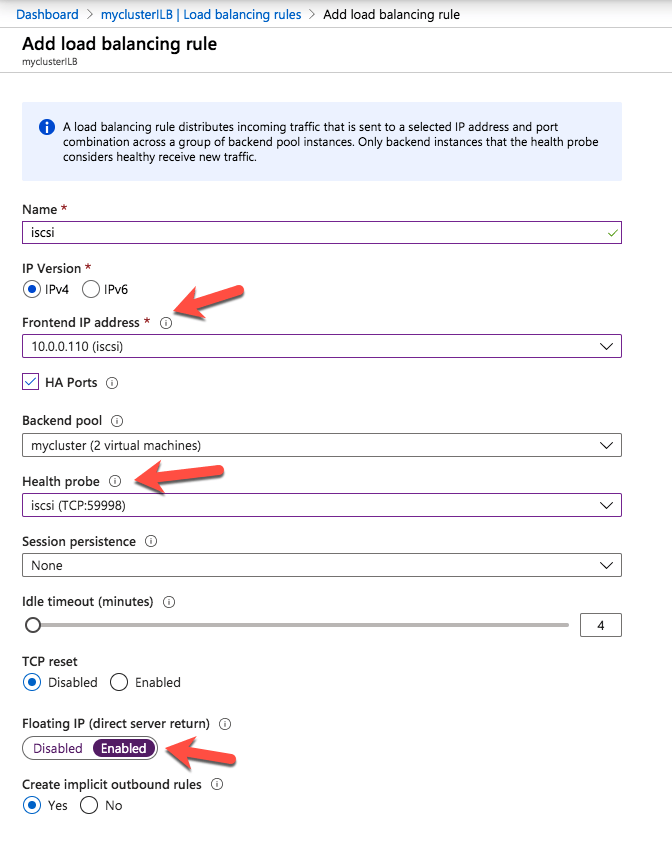
Update load balancer for iSCSI target server cluster resource
Like I mentioned earlier, clients can’t connect directly to the cluster IP address (10.0.0.110) we just created for the iSCSI target server cluster. We will have to update the load balancer we created earlier as shown below.
Start by adding a new frontend IP address that uses the same IP address that the iSCSI Target cluster IP resource uses. Add a second health probe on a different port. Remember this port number, we will use it again in the powershell script we run next We add one more load balancing rule. Make sure to change the Frontend IP address and Health probe to use the ones we just created. Also make sure direct server return is enabled.
The final step to allow the load balancer to work is to run the following Powershell script on one of the cluster nodes. Make sure you use the new Healthprobe port, IP address and IP Resource name.
 PS C:\Users\dave.DATAKEEPER> $ClusterNetworkName = “Cluster Network 1”
$IPResourceName = “IP Address 10.0.0.0”
$ILBIP = “10.0.0.110”
Import-Module FailoverClusters
Get-ClusterResource $IPResourceName | Set-ClusterParameter -Multiple @{Address=$ILBIP;ProbePort=59998;SubnetMask="255.255.255.255";Network=$ClusterNetworkName;EnableDhcp=0}
WARNING: The properties were stored, but not all changes will take effect until IP Address 10.0.0.0 is taken offline and then online again.
Make sure to take the resource offline and online for the settings to take effect.
Create your clustered iSCSI targets
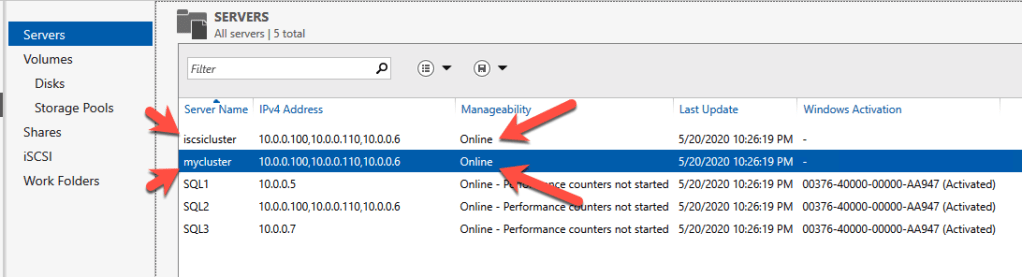
Before you begin, it is best to check to make sure Server Manager from BOTH servers can see the two cluster nodes, plus the two cluster name resources, and they both appear “Online” under manageability as shown below.
If either server has an issue querying either of those cluster names then the next steps will fail. If there is a problem I would double check all the steps you took to create the load balancer and the Powershell scripts you ran.
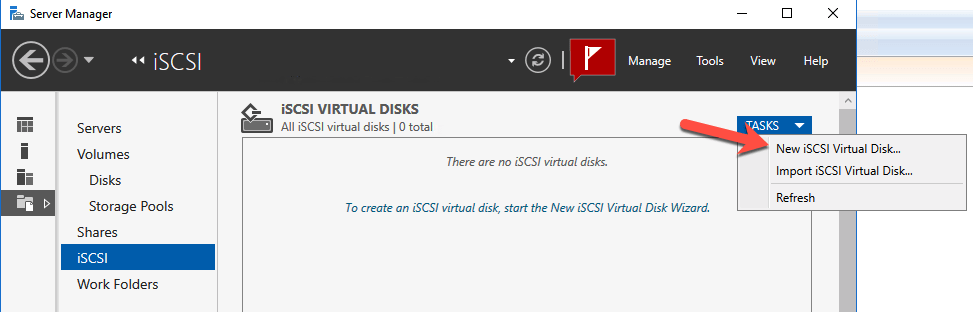
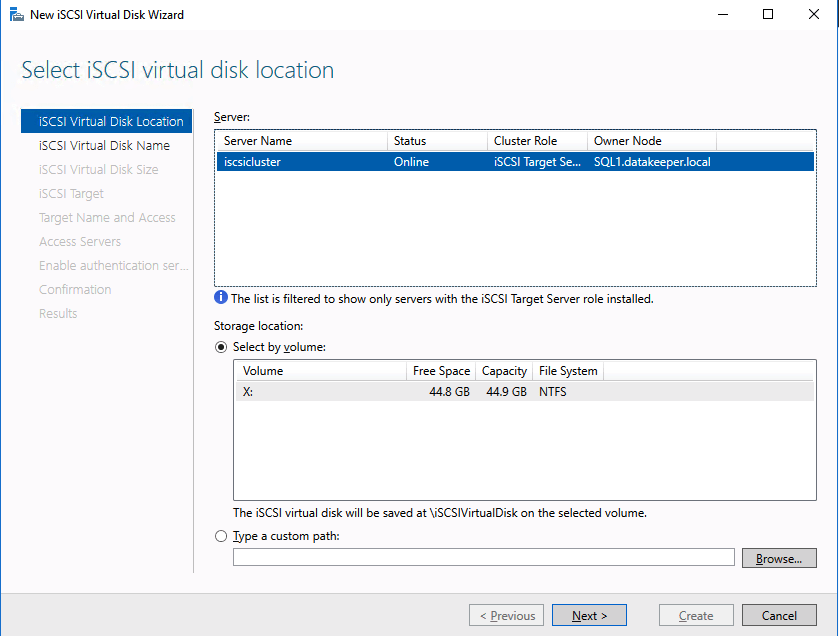
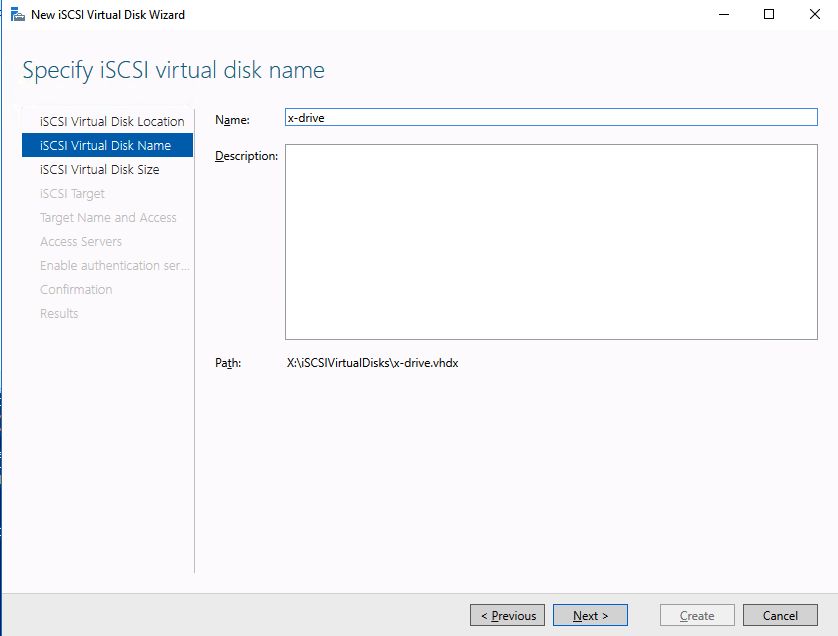
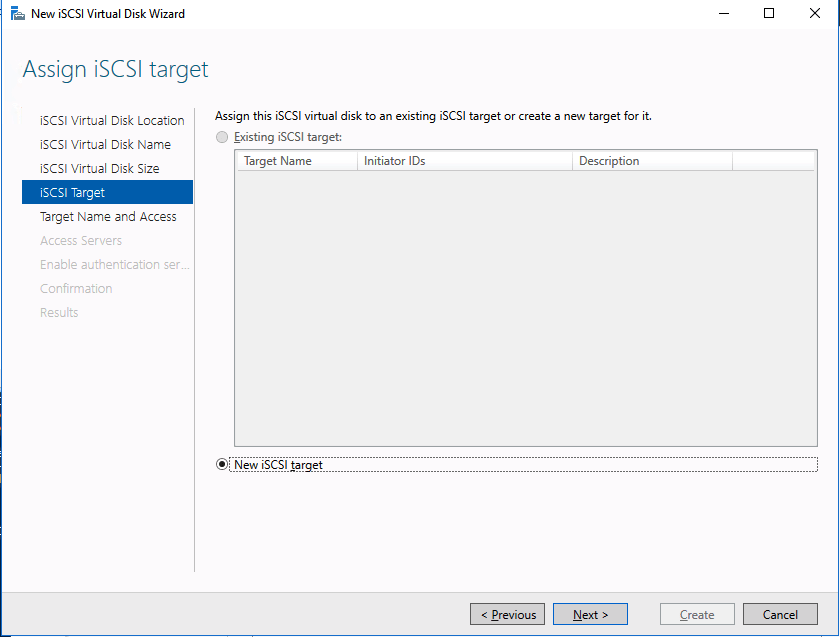
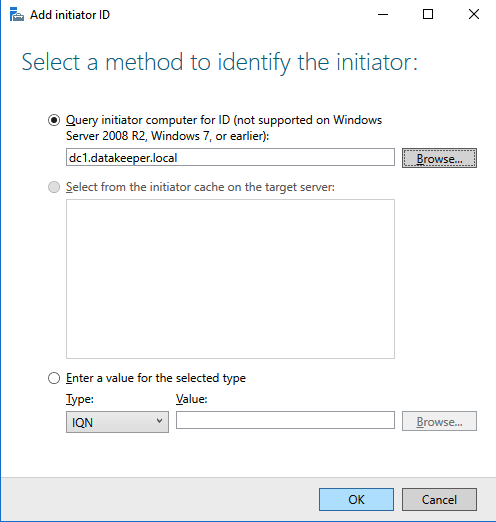
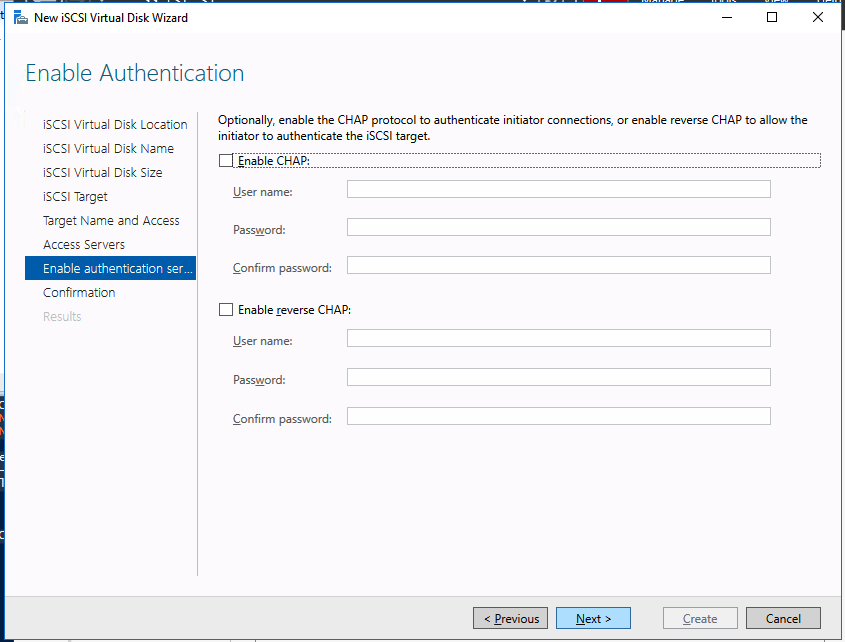
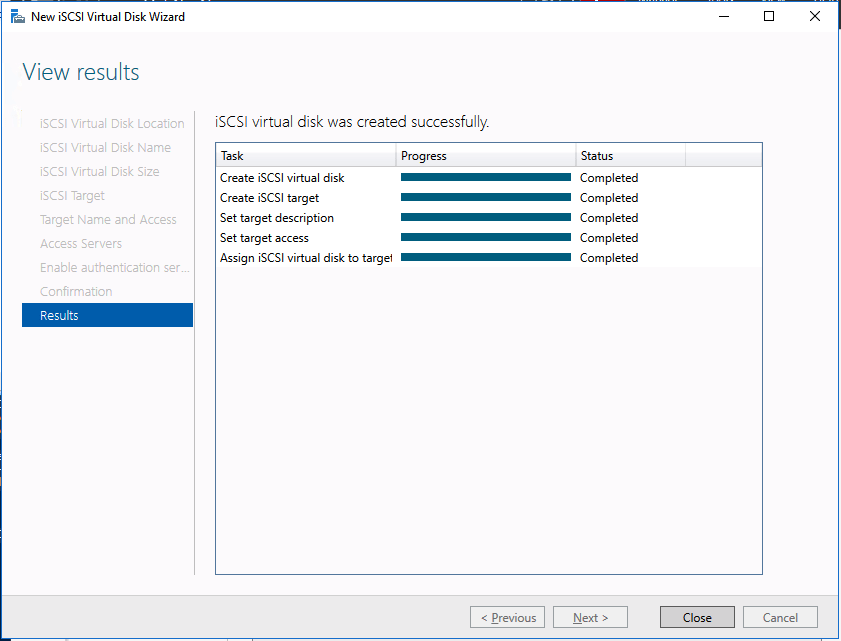
We are now ready to create our first clustered iSCSI targets. From either of the cluster nodes, follows the steps illustrated below as an example on how to create iSCSI targets.
Of course assign this to whichever server or servers will be connecting to this iSSI target.
And there you have it, you now have a functioning iSCSI target server in Azure.
If you build this leave a comment and me know how you plan to use it!
Once downloaded, navigate to the download location and run the executable with /x. This will give you an option to specify a location to extract the files to.
ENU\x64\SQLEXPRADV_x64_ENU.exe /x
Once the extraction completes, navigate to the extracted location and the following location:
SQL\1033_enu_lp\x64\setup\x64
Within that folder you should find SQLWriter.msi. Run this on the system where you want to update the SQL writer.
You now will be able to use ASR to do application consistent recovery points of SQL Server 2008 R2.